How to peel a fruit
A recipe from cooking-ez.com February 21th 2011202 K4.0

For 1 piece, you will need:
- 1 1 grapefruit
- Total weight: 340 grams
Times:
| Preparation |
|---|
| 35 min. |
Step by step recipe
| 1 | You will need the following utensils:
| 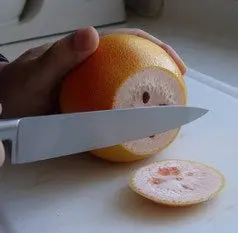 |
| 2 | Split the skin vertically into 4 quarters of similar size. |  |
| 3 | Pull off the quarters of skin. With them you can make delicious candied peel. | 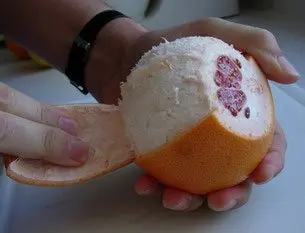 |
| 4 | If necessary, trim any remaining white pith from top and bottom. | 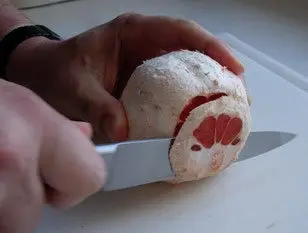 |
| 5 | Put the fruit in front of you, remove the white pith by cutting in vertical strips all round the fruit. | 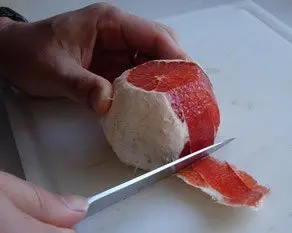 |
| 6 | Complete the operation by trimming off any remaining bits of pith. It's easier if you turn fruit upside down at this stage. | |
| 7 | You should get a "clean" fruit. It is now "pelé à vif", but you need to separate the segments of flesh. | 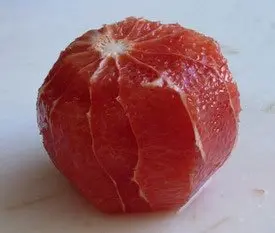 |
| 8 | For the first segment, choose a large one and cut from the outside towards the centre, following the left-hand membrane (transparent skin). | 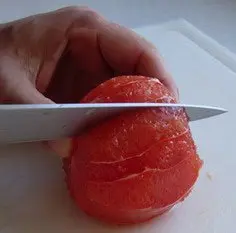 |
| 9 | Then do the same thing with the right-hand membrane. | 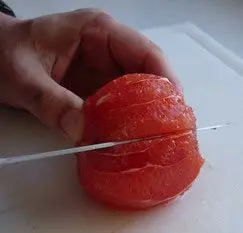 |
| 10 | And so separate the first segment. | 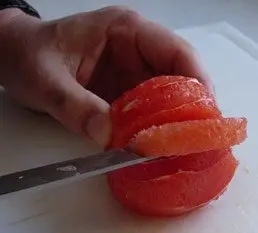 |
| 11 | For all the other segments, start again with the left-hand membrane, and cut from outside to centre. | 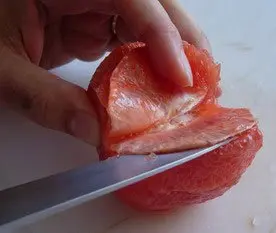 |
| 12 | Now comes the critical moment, when the blade of your knife reaches the centre: turn it gently half a turn (exacty as if you were turning a key to lock a door), and continue cutting, this time back from the centre towards the outside. | 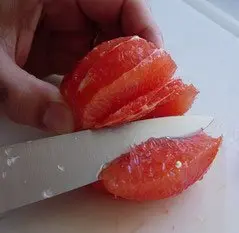 |
| 13 | You will notice that there is only a little to cut, because the turn pratically detaches the segment. | 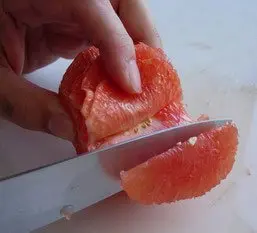 |
| 14 | Then remove the segment... You might need to finish by removing a few pips or pieces of membrane. | 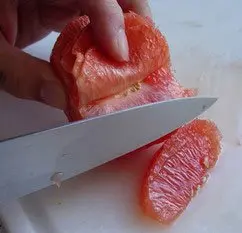 |
| 15 | Do this for all segments. | 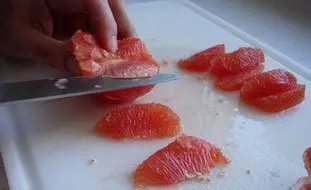 |
| 16 | Have a look at this short video, to see how to peel a grapefruit... | |
| 17 | ...and in this one, a kiwi. |
Remarks
This operation is rather long, but what a result! If you make a fruit salad like this you will be surprised (so will your guests) by the sweetness of your dessert (no hint of bitterness from the pith).I suggest that you work over a strainer on a bowl, or use a chopping board with a small reservoir to keep the fruit juice that runs out. Similarly, squeeze all unused parts of the fruit before discarding them.
View this recipe : https://cooking-ez.com/trucs_astuces/recipe-how-peel-fruit.php
July 26th 2026.