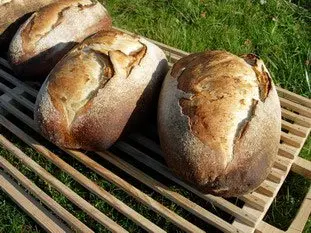
Leavened bread
A recipe from cooking-ez.com May 23th 20171.24 M 24.4
For 2 loaves, you will need:
- 1 300 g leaven
- 2 1 kg plain white flour (French Type 65)
- 3 18 g salt
- 4 440 ml water
- 5 1 g yeast (optional)
- Total weight: 1,760 grams
Times:
| Preparation | Resting | Cooking | Start to finish |
|---|---|---|---|
| 40 min. | 5 hours 10 min. | 40 min. | 6 hours 30 min. |
Step by step recipe
| 1 | In bread-making, the water temperature is always important. It's not a fixed value, but related to 3 other temperatures: 1) the temperature of your flour, 2) the room temperature in your kitchen, and 3) the Basic temperature in bread-making of this recipe, which is 56-62°C. You can calculate the temperature of the water for this recipe in one click, using this small calculator. | 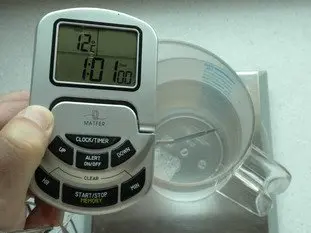 |
| 2 | Put into a food-processor bowl: 300 g leaven, 1 kg plain white flour (French Type 65), 18 g salt, 440 ml water at the right temperature, and 1 g yeast. Then knead on minimum speed for 3 minutes, and 3 further minutes a little faster (speed "1"). Note: For the best way to knead, see: A few tips for effective kneading at home. | 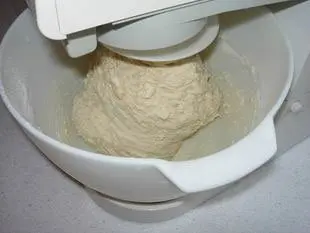 |
| 3 | Transfer the dough into a clean bowl, or leave it in the mixer bowl, and cover with a plastic sheet. It needs to rest for approximately 10 minutes. | 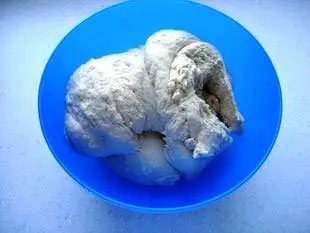 |
| 4 | At the end of this time, tip the dough onto the work surface. You now need to "structure" or work the dough to obtain a beautiful even ball from this heap of dough. The ball should have a well rounded top and a base which is called the seam, where the folds join. To achieve this, fold the sides of the dough into the centre, using the heel of your hand. This first stage kneading (a lighter touch than for hard-wheat dough) French bakers call "frasage". | 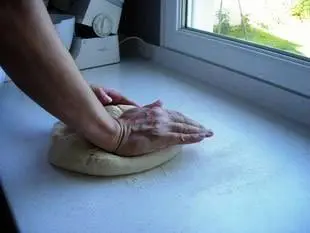 |
| 5 | Continue until you get a nice even ball. | 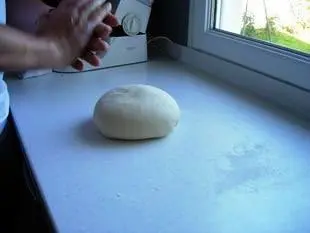 |
| 6 | Then put the ball of dough into a bowl, with the seam underneath, and cover with a plastic sheet. Leave to rise in a warm draught-free place, for approximately 3 hours, this first rising is the "pointage" (starting) in French. | 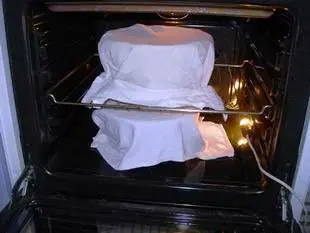 |
| 7 | At the end of this time transfer the dough onto the work surface and "knock back", i.e. remove the CO2 which forms during rising and which gives the honeycomb structure to the dough (the spaces in the cooked crumb). The best way to do this is to press gently on the dough with your hands to crush out the gas bubbles (you may well hear "pschhh" as the gas escapes). | 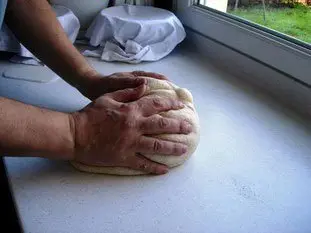 |
| 8 | Then cut the dough into lumps the size or the weight of your choice, and shape the loaves. The photo shows 2 loaves of approximately 800 g, but with this amount of dough you could make one large round loaf. | 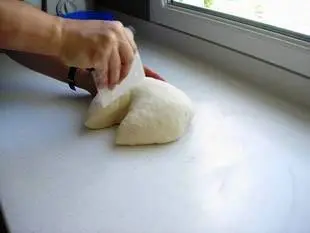 |
| 9 | With each lump, reshape into a ball with a rounded top and seam underneath, always gently, to preserve the honeycomb structure of the bread, by folding the dough towards the underside. Eventually you should get beautiful round shapes again. For round loaves the shaping is now complete. | 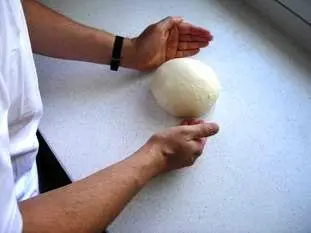 |
| 10 | You can make long loaves, ("batards" or bastards in French!) rather than round ones. For this, turn the ball over and roll it up on itself while at the same time rolling it on the work surface. Foot-note: It's a difficult action to describe, so you can watch it in the short video on the right. | |
| 11 | Place your loaves (gently and with much love) into floured rising baskets (bannetons). Note: the smooth face which will be the top of the bread should be placed downwards, and the seam on top, because the loaves will be turned over before putting in the oven. | 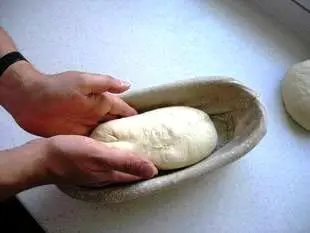 |
| 12 | Cover with a plastic sheet, and put in a warm place again for 2 hours. In French this second rising is called "l'appret" (finishing). | 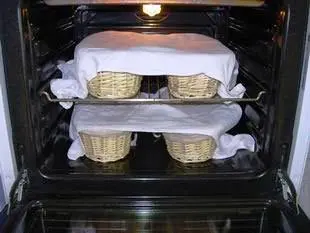 |
| 13 | Preheat your oven at 460°F (240°C). When the dough is ready (well risen), it's time to bake. Flour the peel (bread oven "shovel") and the surface of the loaf, then turn it out onto the peel. You can also put the peel on top of the bread, and turn the whole lot over in a smart but smooth action. Then remove the basket. If you are baking in your kitchen oven, put the loaf on a baking sheet. | 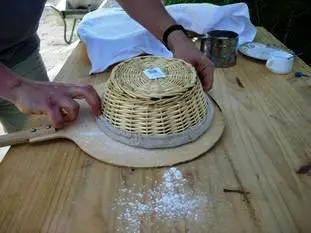 |
| 14 | Slash the top of the loaf with a sharp blade. In French this is "le lamage", then put in the oven immediately. | 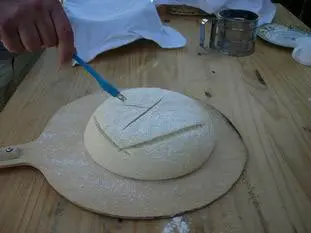 |
| 15 | Cook for about 40 minutes. Note: As when baking any bread, you should ensure that the oven is filled with steam for the first 15 minutes of baking. This page shows you how; it really is the secret of golden-brown, crusty loaves. | 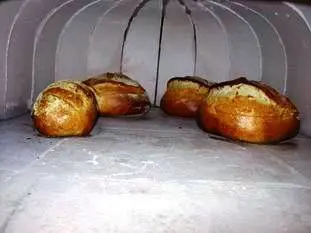 |
| 16 | Removing the baked loaves from the oven is always a magical moment (at least when it works, otherwise it's a drama...). The golden loaves crackle delightfully while cooling ... | 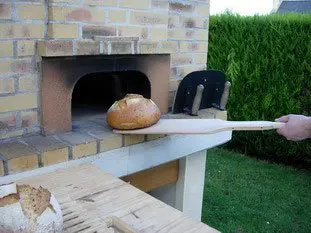 |
| 17 | When the loaves have cooled slightly they should be brushed on the underside to remove surplus flour, and the inevitable bits pieces of charocal and ash (I love this moment!). | 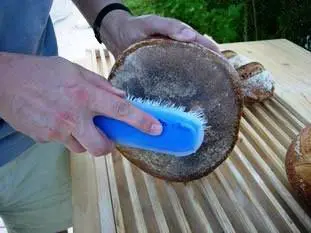 |
| 18 | That's it, finished, now all you need to do now is enjoy your bread. | 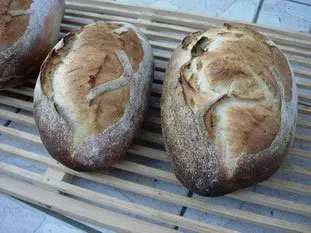 |
| 19 | To inspire you further, you can watch this small film "De la farine à la tartine" (something like "from flour to flavour"). It is not a film of the recipe, but it is based on it. Note: it's a non-audio film, except for strategic moments. |
Remarks
If you'd like more information about making your own bread, you can see this dedicated page.If you wish to increase or decrease the amount of dough, you can use this small converter, just enter the quantity of flour, or water or leaven, and it will calculate automatically the weight of the other ingredients necessary. It's also possible that according to the quality of your flour, your dough will be too soft, not firm enough, in this case reduce the water volume.
The very small quantity of yeast (0.25%) is important for the rising of the bread. Note that the French legislation authorises bakers to add up to 2g yeast per kilo of dough in their "leavened bread", and this they do, even the most renowned...
You will find it's easier to succeed if you make large round loaves.
When familiar with this recipe, try the special breads or the new leavened bread (a bit more sophisticated).
Yeast in leaven-raised bread?
Many of you are puzzled by the presence of yeast in a leaven-raised bread. Here is a little clarification of the matter:The yeast is there to make things easier; for a beginner leaven-raised bread is not easy to get right, especially first time. This is why these few added grams of yeast help. The dough rises more easily, even if your leaven is not at its best, and it makes a lighter crust.
There's nothing shocking in this. You should be aware that even some commercially produced breads advertised as "leavened", also contain a little (more) yeast, for similar reasons, and it's perfectly legal.
In any case, there's no reason to be worried about yeast; it's not a chemical product. It too is a living organism, and it's not added to work against the leaven, rather something you can use alongside if you wish. Being able to proclaim proudly, "I don't use any yeast!" is, in my humble opinion, rather overrated.
That said, adding a little yeast does have one slight drawback, in that it dulls the flavour of the bread somewhat. If you want to make leavened bread for its characteristic flavour, you'll lose a little, even with a small quantity of yeast.
In conclusion, I advise the following approach: if you are just starting out, add a little yeast. Then, once you have mastered the basics and can produce good bread, leave it out. You can then compare both methods and choose.
I'll finish with a short quotation: "I will make you a bread so good that that will not be an accompaniment anything else, but a food for gourmets" (Actor Raimu for Author/Director Marcel Pagnol in the movie "The Baker's Wife").
View this recipe : https://cooking-ez.com/four/recipe-leavened-bread.php
February 24th 2026.

