Home-made terrine of foie gras
A recipe from cooking-ez.com December 16th 20245.32 M 74.6
For 1 foie gras, you will need:
- 1 1 raw foie gras (weight about 500 g)
- 2 6 g fine (or table) salt
- 3 2 g pepper
- 4 0.5 g "Quatre-épices" spice blend
- 5 5 g caster sugar
- 6 5 ml Port
- 7 5 ml Brandy (Cognac or Armagnac)
- Total weight: 525 grams
Times:
| Preparation | Resting | Cooking | Start to finish |
|---|---|---|---|
| 4 days 12 hours 40 min. | 2 hours 35 min. | 40 min. | 4 days 15 hours 50 min. |
Step by step recipe
| 1 | If your liver is already deveined, skip to step 9.Deveining:Take the liver out of the fridge at least two hours beforehand, so it will be at room temperature and soft.Rinse it thoroughly under warm water to eliminate any remaining traces of blood, then dry it with absorbant paper. | 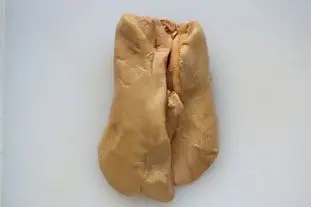 |
| 2 | Pull the two lobes apart gently. | 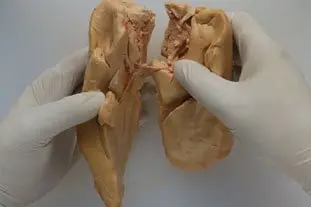 |
| 3 | Pull the veins carefully towards you and remove them, without breaking or cutting, by passing your fingers underneath and following them right to the end. This is the first tricky stage of the recipe. Your hands will get very greasy (to be expected with a foie gras, you might say), and you should not leave any veins, or as few as possible. | 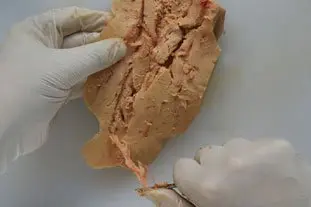 |
| 4 | You might feel more comfortable working in fine rubber (surgical) gloves. I recommend using a vegetable peeler as the point does the job quite well. Another tip: have a bowl or a large cup in front of you and scrape the sticky veins off the blade into this as you work. | 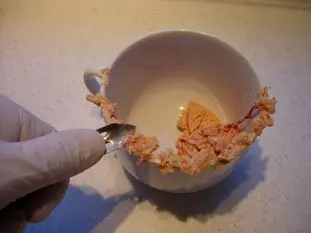 |
| 5 | Once done, don't worry about the forlorn look of the liver, it's past caring! | 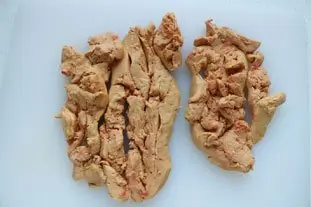 |
| 6 | To remove any traces of blood, put the liver in cold water with a tablepoonful of coarse salt and some ice cubes added, for half an hour. Then rinse the liver under running cold water and dry on absorbant paper. |  |
| 7 | Line a wide oven-proof (gratin) dish with cooking-grade plastic film. This is not essential, it just makes cleaning the dish afterwards much easier. | 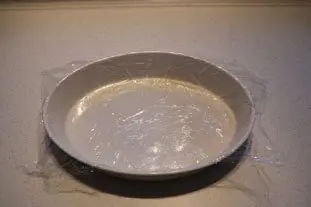 |
| 8 | Spread the liver out in the dish in a single layer, as far as possible. | 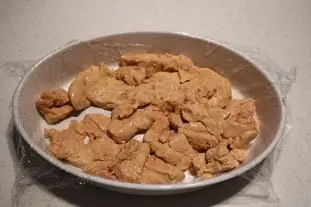 |
| 9 | If your liver is already seasoned, skip step 13.Seasoning:Start by adding the alcohol. Trickle a few shlurps of Armagnac and Porto over the liver.You only need a little, otherwise the flavour of the booze will dominate over that of the liver, which is a shame. Note: Prefer white alcohols instead of red ones, because red ones turn liver to grey when cooking. | 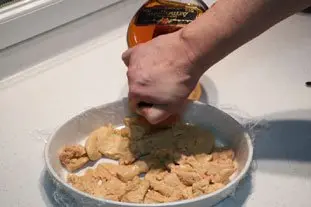 |
| 10 | Weigh and mix the seasonings: salt, pepper, sugar and "quatre épices" spice blend (see below*). Do calculate these quantities carefully and respect the following proportions:7 g salt and 2 g pepper for 600 g liver. The best way to do this is by using precise scales, but you can also measure them: 1 level teaspoon = 5 g of fine salt or 2.5 g of ground pepper (or near enough). This is the second tricky stage of the recipe. It is important to use the right quantity of salt for the weight of liver. To help you, here is a little automatic calculator. | 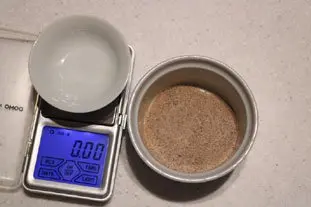 |
| 11 | After weighing the correct amounts, mix the seasonings and scatter the mixture over the liver. To spread them more evenly, scatter half, then turn the pieces of liver before adding the other half. | 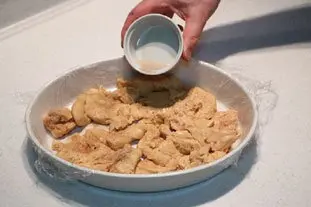 |
| 12 | Cover the seasoned liver in its dish with a plastic film and refrigerate overnight. Please note: the liver's maturing time in the fridge is important for the flavour. If you don't do this, it will still be good, but not quite as good as if left overnight. | 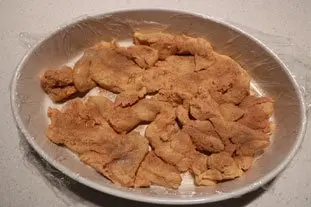 |
| 13 | Next day, the liver is ready to be cooked. Take out of the fridge and remove the plastic film at least 2 hours before cooking. | 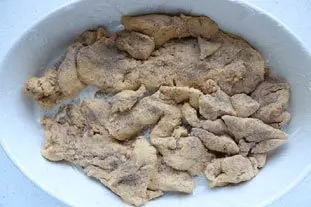 |
| 14 | CookingIt must be recognized, cooking is THE difficulty of preparing the liver, it must reach a certain temperature at heart, 158°F (70°C) for example, and this temperature must be reached gently, otherwise the liver melts and loses all its fat.I suggest 2 cooking methods, the classic bain-marie terrine cooking, called "De Françoise", and especially cooking called "flat" ": | 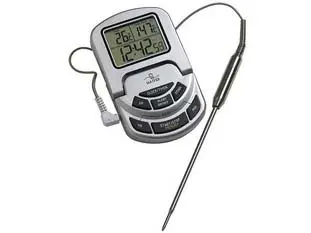 |
| 15 | 1) "Flat" cooking Preheat the oven to 210°F (100°C), preferably without fan - quite unnecessary at such a low temperature. Stick a thermometer into the thickest part of the liver and put in the oven. If you'd like to keep the liver "pink", cook until the temperature reaches 122°F (50°C). For "mi-cuit" (just properly cooked, but not overdone), cook until it reaches 149°F (65°C). If you don't have a thermometer, count 30 minutes cooking for "pink" and 45/50 minutes for "mi-cuit". Unfortunately, these times can only be approximate as your oven and the room temperature will have a marked effect on the cooking. In other words, as soon as you can, buy yourself a thermometer. | 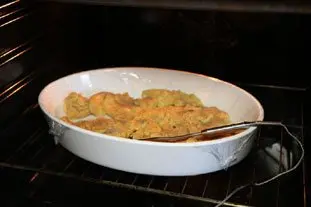 |
| 16 | After cooking, the liver looks unattractive swimming in its fat and cooking juices, but don't worry, this is perfectly normal. | 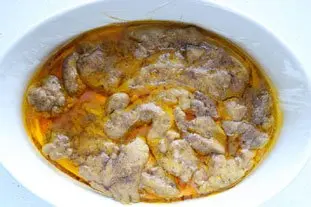 |
| 17 | Now it's time to pack the terrine with the pieces of liver. Use a skimmer to fish the pieces of liver out of the dish, drain them... | 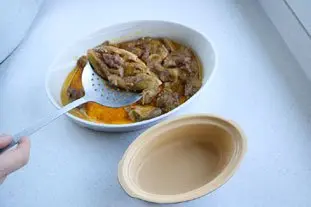 |
| 18 | ...and transfer to the terrine. If you intend turning out the terrine later, choose the best-looking and largest pieces first to go in the bottom and finish up with the smaller ones (as in the photo). | 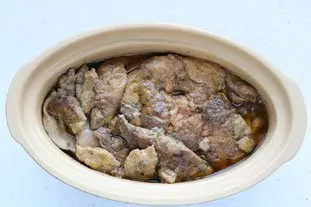 |
| 19 | If, on the other hand, you will be serving the terrine straight from the dish, save the best pieces until last (like in this photo). This cooking method, inspired by chef Eric Leautey, is very efficient as the centre of the liver gets up to temperature more rapidly when it is in a thin layer. This is the method I use for years. | 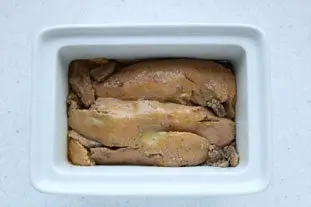 |
| 20 | 2) "De Françoise" Preheat the oven to 300°F (150°C). Roughly reconstitute the liver in the terrine, placing the pieces on top of each other. | 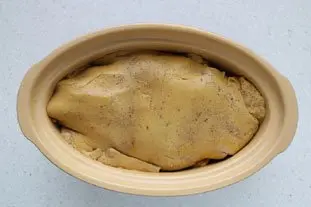 |
| 21 | Place the terrine in a baking dish that you fill 3/4 of boiling water. | 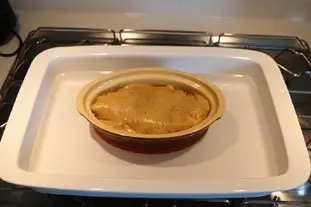 |
| 22 | Put the dish in the oven and let the liver cook for 50 minutes uncovered, checking regularly with a thermometer that the water temperature is 158 ° F (70 ° C): - If the temperature rises too much add half a glass of cold water - If it goes down too much increase the temperature of the oven a little and pour a little boiling water in the dish (it is good to have a small pot of water on the fire handy throughout cooking). | 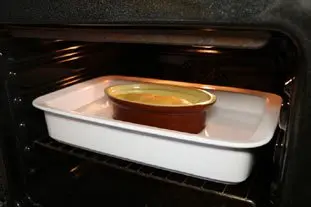 |
| 23 | At the end of this time, remove the terrine from the oven and pour the liquids contained (fat and cooking juices) into a container, retaining the liver with a skimmer. Your "De Françoise" terrine cooking is finished. | 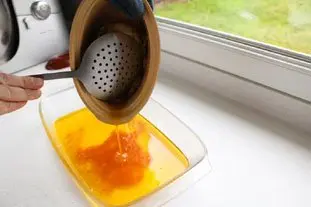 |
| 24 | Finish the terrine by pouring over a little of the molten fat from the cooking dish. | 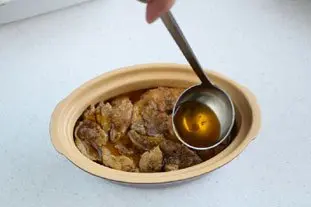 |
| 25 | This is not just an attractive finishing touch; once set, it will help the terrine keep better. | 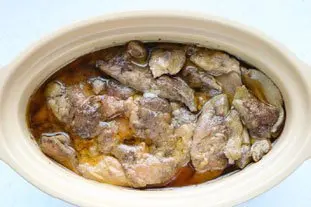 |
| 26 | The final stage is to compact the terrine a little. I use a block of polystyrene cut to fit the shape of the dish (but a piece of thick cardboard would do just as well), covered with aluminium foil. I place this on top of the contents of the terrine and stand two jars of jam on top. The weight of the full jars is enough to press the terrine. Leave to cool for 2 hours at room temperature, then refigerate. | 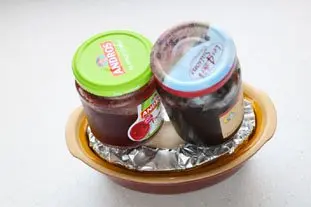 |
| 27 | The "press" contraption can be removed after a couple of hours in the fridge. Your terrine should be left for at least 4 days in the fridge before eating, to give time for the flavour to mature fully. | 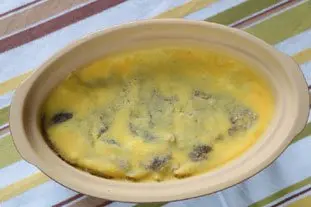 |
| 28 | Note that it's also possible to cook using a 3rd method, "En ballotine", which is both very simple and quite quick. See how to do it with this recipe: foie gras en ballotine | 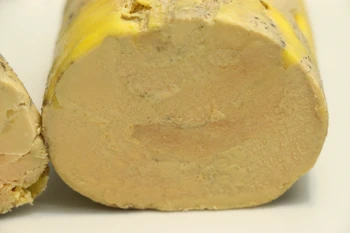 |
| 29 | The serviceServe your foie gras either by removing the terrine from the mold (immerse the bottom for a few seconds in hot water to facilitate demoulding) and turning it over on a serving dish to cut slices, as on this photo.Or, without removing it from the mold, by cutting slices in the bowl directly to the taste of the guests. In all cases, take the bowl out of the fridge 10 minutes before serving , so that it is not too cold during the tasting. | 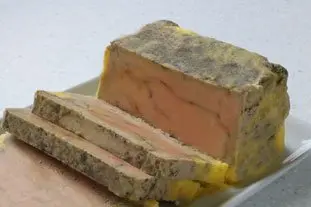 |
Remarks
If you want a more natural taste, more pure foie gras, you can reduce the alcohol in this recipe to just one tablespoonful (or omit).Again on the subject of alcohol, there is no need to be strict on the type or their number. Cognac and Armagnac are much the same (for the purposes of this recipe, at least); the same goes for sherry and port, or other fortified wines like Marsala, Maury, Madeira, etc.
For bread which goes best with foie gras, resist the temptation to use sliced industrial bread, or even worse brioche or other rich sweet bread (too soft, too sweet, too similar to foie gras). Better to use a more acidic, rustic bread like a classic "pain de campagne". For me, the best of all will always be a leaven-raised bread.
If you are worried about tackling this recipe, you can start with the easier method in terrine of foie gras.
If, like me, you are a foie gras aficionado but have a problem with the tradition of force-feeding geese, there is a glimmer of hope: check this out.
*In France, a blend of spices is sold as "quatre épices". You can make your own by mixing ground pepper, nutmeg, cloves and cinnamon.
View this recipe : https://cooking-ez.com/entrees/recipe-home-made-terrine-foie-gras.php
February 5th 2026.
