This site uses only a few technical cookies necessary for its operation. By continuing to browse, you accept their use.
To find out more...
To find out more...
Yeast-based flaky dough (for croissants)

This yeast-based flaky dough (or croissant dough) is where puff pastry meets a yeast dough (such as brioche dough). This means that not only will we get flaky layers, but the dough will also swell and rise.
The method is along the same lines as for a feuilletage: the basic dough is first kneaded, then layered with butter and folded over several times (in "turns") to give it its flakiness.
This is a highly technical dough and quite tricky to make well at home by hand, with a rolling pin. But don't despair, this version is adapted for home baking and you'll find all the tips and tricks you need to succeed.
Last modified on: June 9th 2019
For 1 kg 400 g, you will need:
- 1
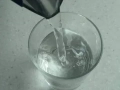
 110 ml water
 - 2
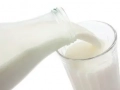
 100 ml whole milk
 - 3
 50 g egg ( How to... )
 - 4
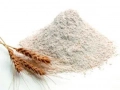
 500 g plain white flour (French Type 45)
 - 5
 9 g fine (or table) salt
 - 6
 70 g caster sugar
 - 7
 25 g yeast
 - 8
 10 g honey
 - 9
 30 g butter
 - 10
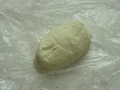
 100 g fermented viennoiserie dough
 - 11
 50 g leaven (optional)
 - 12 300 g butter
- Total weight: 1,305 grams
Times for this recipe
Preparation: 60 min.
Resting: 3 hours
All in all: 3 hours 60 min.
If you start now, at , you will finish around : ?.Change start time
To finish around 7pm, you'll need to have started before: .Change end time
Step by step recipe
Stage 1 - ⌛ 2 hours
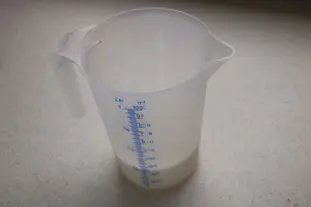
Put into a jug: 110 ml water, 100 ml whole milk and 50 g egg. Refrigerate overnight, or for at least 2 hours.
We need to do this (as for all viennoiserie doughs) because we need to work with very cold ingredients.
We need to do this (as for all viennoiserie doughs) because we need to work with very cold ingredients.
Stage 2 - ⌛ 5 min.
Basic dough
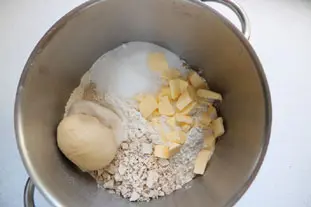
Pour the water+milk+egg mixture (really cold) into a mixer bowl, then add 50 g egg, 9 g fine (or table) salt, 70 g caster sugar, 25 g yeast, 10 g honey, 30 g butter, 100 g fermented viennoiserie dough and 50 g leaven.Stage 3 - ⌛ 20 min.
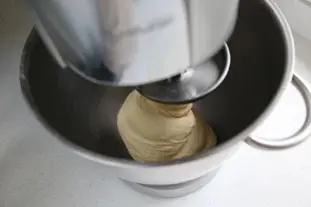
Knead on slow speed for 8 minutes, then on slightly higher speed for 10 minutes.
Note: For the best way to knead, see: A few tips for effective kneading at home.
Note: For the best way to knead, see: A few tips for effective kneading at home.
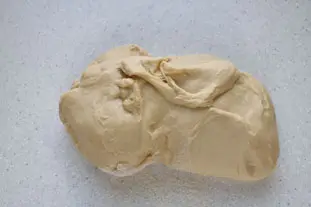
Stage 4
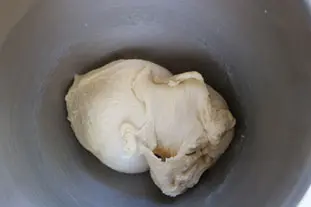
You should now have a supple, firm dough.
Stage 5 - ⌛ 1 min.
To be sure the dough is well-enough kneaded, do the window-pane test. If it isn't ready, knead for a little longer.
Stage 6 - ⌛ 1 min.
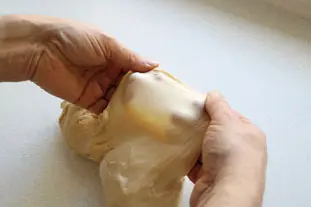
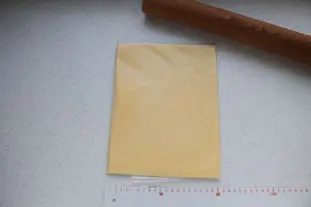
Tip out the dough onto a floured worktop.
Stage 7 - ⌛ 1 min.
Shape the dough into a long roll, as shown in this short video.
Stage 8 - ⌛ 15 min.
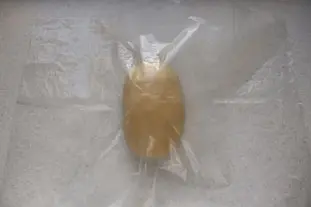
Cover the dough with plastic sheet and leave to rest for 15 minutes.
Stage 9 - ⌛ 45 min.
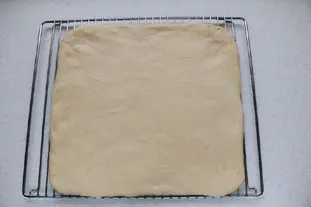
After this time, roll out the dough with a rolling pin into a large rectangle, the same size as your oven shelf, and lay it on this.
Lay a plastic sheet on top and put the lot into the freezer for 45 minutes to thoroughly cool the dough.
Lay a plastic sheet on top and put the lot into the freezer for 45 minutes to thoroughly cool the dough.
Stage 10 - ⌛ 5 min.
Meanwhile, prepare the 300 g butter: wrap it in plastic sheet and hit with a rolling pin until it is the same height as the rectangle of dough, but only half as wide.
Stage 11
Once you have the right sized rectangle, put the butter to wait in the fridge.
Stage 12 - ⌛ 3 min.

Layering with butter
Check that the dough and butter are at about the same temperature, i.e. very cold (this is most important). Lay the dough on the worktop.Take the rectangle of butter out of its plastic wrapping and lay on the dough. If you have measured correctly, the butter should cover half the width of the dough and its full height.
Stage 13 - ⌛ 2 min.
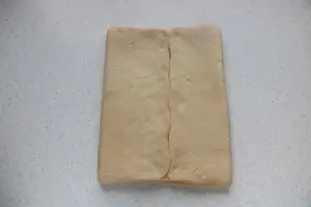
Fold the sides of the dough over the butter. The edges should meet in the centre to completely cover the butter.
Stage 14 - ⌛ 2 min.
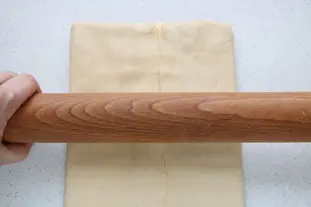
With the rolling pin press over the whole surface to spread out the butter on the inside.
It doesn't matter if a little butter squashes out at the ends.
It doesn't matter if a little butter squashes out at the ends.
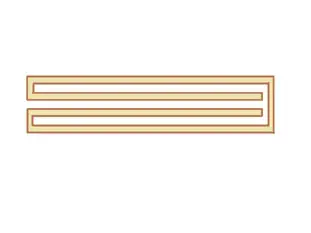
Stage 15

So, at this stage we have one layer of butter sandwiched between 2 layers of dough, as in this diagram (yellow = butter, brown = dough).
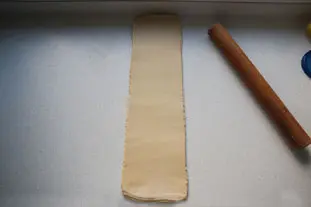
Stage 16 - ⌛ 7 min.
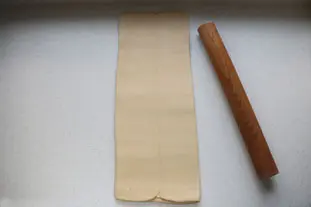
Roll out the dough lengthways to about 24 inches (60 cm).
I admit this is hard work; it takes a lot of energy to roll out a firm dough.
I admit this is hard work; it takes a lot of energy to roll out a firm dough.
Stage 17 - ⌛ 1 min.

The double turn
Fold the dough ends in, but not into the centre...Stage 18
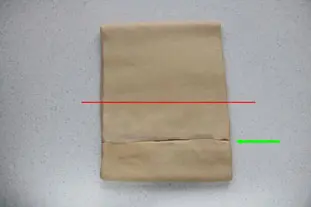
...make the join at about 2/3.
The red line shows the dough's centre line and the green arrow indicates where the two ends of the dough are folded in to meet. The ends meet at the 2/3 point rather than halfway because the next step involves folding the dough in half and this would place the 2 joins one on top of the other, which would make poor flakes.
The red line shows the dough's centre line and the green arrow indicates where the two ends of the dough are folded in to meet. The ends meet at the 2/3 point rather than halfway because the next step involves folding the dough in half and this would place the 2 joins one on top of the other, which would make poor flakes.
Stage 19 - ⌛ 1 min.
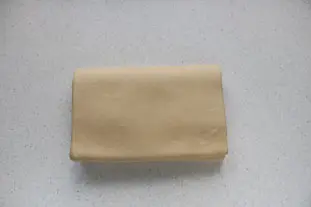
Then fold the dough in half.
Stage 20
You have now made a double turn or "wallet turn".
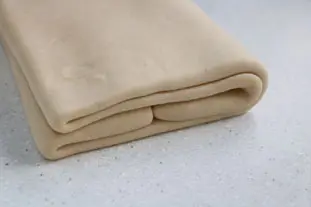
Stage 21
By this stage, we now have 4 layers of butter between 8 layers of pastry (as in this diagram (yellow = butter, brown = dough).
Stage 22 - ⌛ 1 min.
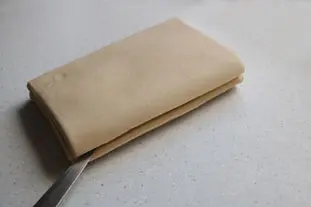
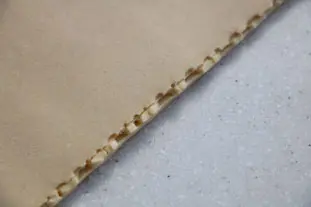
With a very sharp kitchen or craft knife, slit through the fold of dough on one side...
Stage 23
...then the other.
This is so that the flakes can develop fully with no round edge, just uninterrupted layers of dough and butter.
This is so that the flakes can develop fully with no round edge, just uninterrupted layers of dough and butter.
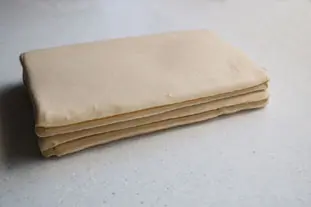
Stage 24 - ⌛ 5 min.
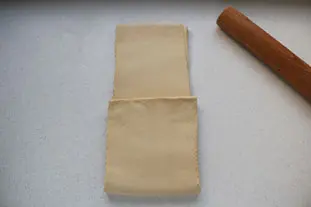
Give the dough a quarter turn, then roll out lengthways again to about 24 inches (60 cm).
Stage 25
It doesn't matter if the butter is showing a little around the edges - quite the contrary: this shows the butter is well distributed through the layers of dough.
Stage 26 - ⌛ 1 min.
The single turn
Fold one third of the dough in towards the centre...Stage 27 - ⌛ 1 min.
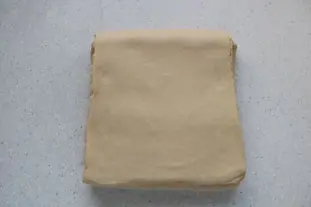
...and fold the remaining third over the top.
This is a "simple turn".
This is a "simple turn".
Stage 28 - ⌛ 1 min.
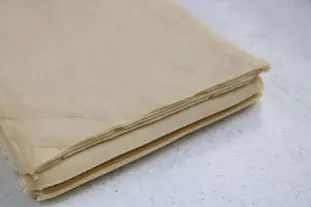
Split the side folds one last time.
Stage 29
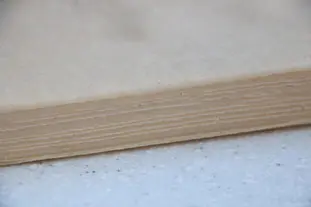
It might be hard to see now, but this double turn and single turn has given you a yeast-based flaky dough made up of 13 layers of dough enclosing 12 layers of butter. When baked, this will create a superb flaky "feuilletage".
Stage 30
Your yeast-based flaky dough is now ready. Wrap in plastic film and refrigerate for 2 hours before using, or freeze for later.
Remarks
When making any viennoiseiries, but especially this yeast-based flaky dough, cold is your friend. This is because the recipe uses a lot of butter. If you are having trouble with the folding and turning because the dough is going soft, pause and put the dough in the freezer to firm up for 30 minutes (or longer). Do this as often as necessary.
Ideally, the butter to use for this kind of flaky dough is the special "beurre de tourage" the professionals use, which can be hard to find. But don't worry, normal butter works quite well.
Ideally, the butter to use for this kind of flaky dough is the special "beurre de tourage" the professionals use, which can be hard to find. But don't worry, normal butter works quite well.
Keeping: Should be used the same day or frozen.
Source: Based on a recipe by Sébastien Ropers of the Penn-ar-bread bakery, a true master baker.
Nutritional information
How much will it cost?
- For 1 kg 400 g : 4.40 €
Change currency:
Note: Be careful, these prices are only an estimate, you can consult the table of prices by ingredients used for this estimate.
Some other recipes using this recipeSee them all 7
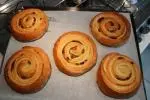
Pistachio and goji pinwheels
Inspired by the traditional French "pain aux raisins" (like Danish pastries), here is a colourful and flavoursome version filled with pistachio cream and goji berries.
45 K 2 hours 20 min.

French croissants
In this famous and highly technical recipe from a piece of yeast-based flaky dough we are going to cut and shape ("roll") croissants.
653 K 24.4 2 hours 35 min.

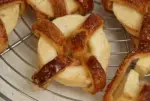
Boulangère tart tatin with vine nectarines
You may already be familiar with the famous apple tarte tatin, but here's a very tasty bakery version, with vine nectarines and croissant dough.
21 K 1 hour 30 min.
Croissant dough apples
Thick slices of apples, rolled in sugar and surrounded by a strip of crescent dough, which, after a spell in the oven, become delicious puff pastry apples.
28 K 1 hour 50 min.
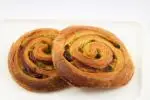
Raisin breads (pains aux raisins)
Raisin breads (pains aux raisins) are one of the three viennoiseries found in all good French bakeries, along with croissants and pains au chocolat. It is a delicate roll of yeast-based flaky dough (the dough of croissants) filled with custard and raisins.
42 K 2 hours 45 min.
This recipe uses (among others)
Plain white flour (French Type 45)
Like these other recipes: Brioche dough, Sweetcrust pastry (pâte sablée), ... See them all 2
Water
Like these other recipes: Turban of sole with langoustines, "Buttonhole" quail eggs, Olive and pesto bread, Chorba, Poaching syrup, ... See them all 139
Whole milk
Like these other recipes: Gratin Dauphinois, Chocolate and vanilla crème brûlée, Peach and verbena feuilleté, Caramel semolina pudding with raisins, Polenta with beetroot tops, ... See them all 69
Fermented viennoiserie dough
Like these other recipes: Milk rolls, Flaky brownie brioche, Brioche dough, Kouign-amann brioche, Rolled chestnut and apple brioche, ... See them all 7
Other recipes you may also like
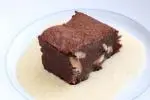
Brownies
Brownies are traditional North-American tray-baked cakes: always moist in texture, usually with chocolate and pecan nuts. Brownies should still be soft in the middle, so need to be slightly undercooked. March 8th 2020131 K4.1 35 min.

Madras rice
Slices of sautéed aubergine and the lovely yellow colour from the curry spices bring a hint of India to this rice dish, given a twist with a little fried ham. December 16th 201895 K 30 min.
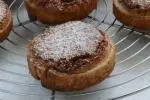
Mirlitons of Guipavas
You may already be familiar with mirlitons, a delicious little bakery pastry made from puff pastry and almond cream, but here are the mirlitons from Guipavas, which are even more delicious because they're made from June 25th 202329 K 1 hour 15 min.
Butterfly pasta with smoked trout
Butterfly pasta, diced smoked trout with cheese, and a touch of green with parsley. February 7th 202429 K 20 min.
Chestnut cake
This delightful cake is doubly chestnutty: it contains chestnut flour, and sweet chestnut purée. August 28th 2025355 K5 1 hour 15 min.
The 4 comments already posted on this recipe
Left or right does not really matter, I just prefer left.
Yes, unsalted butter, if it's salted butter in a recipe I precise it.
Have fun!
In stage 24 ,the dough position it's moving a quarter from position in stage 19. Left or right?
The butter must be unsalted?
Thank you very much for the recipe. I can't wait to do it.
Daniela