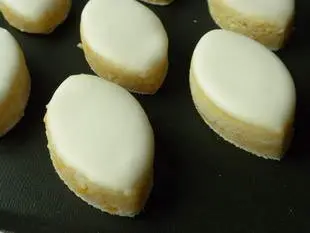
Calissons
A recipe from cooking-ez.com February 12th 2012157 K 53.8
For 20 Calissons, you will need:
- 1 50 g candied grapefruit peel
- 2 100 g ground almonds
- 3 80 g icing sugar
- 4 1 egg white
- 5 1 sheet of rice (wafer) paper
- 6 125 g royal icing
- Total weight: 390 grams
Times:
| Preparation |
|---|
| 1 hour 30 min. |
Step by step recipe
- 1: Chop 50 g candied grapefruit peel using food processor to produce small pieces of peel.
- 2: Stop the processor, then add 100 g ground almonds and 80 g icing sugar.
- 3: Switch on again and add the egg white a spoonful at a time until you have a smooth paste - calisson paste.
- 4: Spread the calisson paste out roughly on a sheet of rice paper laid on a chopping board.
Put the paste between two rulers 1cm (0.4 inch) thick, simple iron bars in this case, but use anything you like (wood, plastic...). - 5: Place a sheet of cooking parchment on top of the paste.
- 6: Roll out the paste, guided by the rules either side, into a very even sheet.
- 7: Cut out the calissons with a cutter, pressing down really hard (I give a light hammer blow on the top) so that you also cut through the rice paper underneath.
- 8: Gather all the offcuts of paste, roll out again on the remaining piece of rice paper and cut out more.
Continue unti you have used up all the calisson paste. - 9: Prepare 125 g royal icing.
- 10: Dip the top of the calisson (the side without rice paper) in royal icing. You can stick it on a fork to make this easier, but this isn't essential.
- 11: Wipe off any excess icing on the sides with your finger and place the calisson on a baking sheet.
You will notice how, after a few seconds, the royal icing becomes smooth once the calisson is laid flat.
Do this with all the calissons. - 12: Leave to dry exposed to the air for 2 days, until the royal icing turns hard.
Your calissons are ready.
Remarks
Traditional calissons normally contain candied melon and orange.If you are in a hurry, rather than waiting for 2 days, you can dry the calissons in a cool oven at 50°C (122°F) until the royal icing forms a crust.
View this recipe : https://cooking-ez.com/desserts/recipe-calissons.php
February 12th 2026.

