Real home-made chips*

It's not easy to make these - the original "French fries" - well at home, that is, to produce golden and crunchy chips from fresh potatoes. Here is a way of doing it in three cooking stages, which gives very good results: melting in the middle, crunchy on the outside, and a nice golden colour. What's more, everything can be prepared in advance.
[Translator's note: I have called these "chips" (the British English term, not to be confused with flat round "crisps", being what Americans understand by the term) rather than "French fries", to distinguish them from the very fine-cut variety often served under that name, and hope that American visitors will understand and forgive me].
[Translator's note: I have called these "chips" (the British English term, not to be confused with flat round "crisps", being what Americans understand by the term) rather than "French fries", to distinguish them from the very fine-cut variety often served under that name, and hope that American visitors will understand and forgive me].
421K 101 3.9
Last modified on: December 30th 2019
Keywords for this recipe:For 6 people, you will need:
 1 kg
1 kg 
How long does it take?
Time required for this recipe:
| Preparation | Resting | Cooking | Start to finish |
|---|---|---|---|
| 27 min. | 1 hour | 20 min. | 1 hour 47 min. |
At what time:
- When will I finish if I start the recipe at ... ?
When should I start for the recipe to be ready at ... ? - Work this out...
Step by step recipe
Stage 1 - 10 min.
Stage 1: boiling.
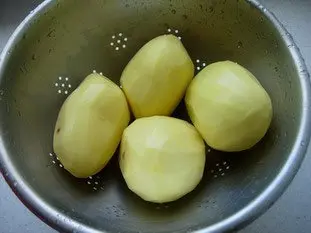
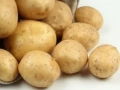
Peel and rinse 1 kg potatoes. It's a good idea to use large potatoes. I have a preference for samba but bintje, and no doubt other varieties, are also quite suitable.
Peel and rinse 1 kg potatoes. It's a good idea to use large potatoes. I have a preference for samba but bintje, and no doubt other varieties, are also quite suitable.
Stage 2 - 5 min.

Cut the potoatoes into fairly thick slices (about 1 cm or 0.4 inches).
Stage 3 - 5 min.
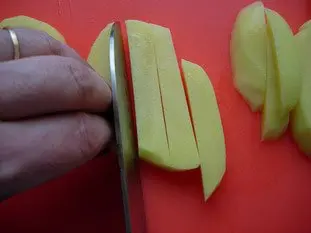
Cut the slices into sticks of the same thickness. It's important not to make the chips too thin, otherwise they'll not be soft in the middle.
Stage 4 - 5 min.
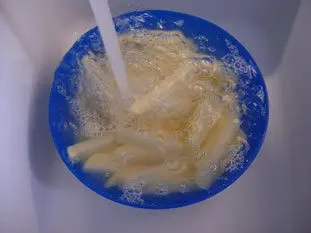
Put the cut chips in a large bowl under running water for 2 to 3 minutes, swishing them round from time to time until the water runs clear.
Stage 5 - 10 min.
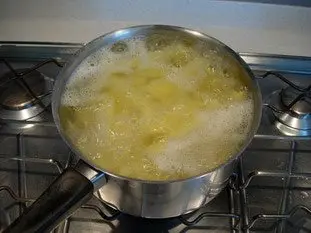
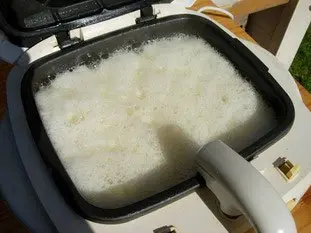
Prepare a large pan of lightly salted water and put the chips on to boil.
It's important that the chips are thoroughly cooked, to the point where the corners or edges begin to crumble, as you can see in the photo lower down, and become irregular.
It's a bit tricky, as the chips become fragile once cooked, but it's worth knowing that the more cooked the chips, the better they'll be. But do take care; a few minutes too long and you'll end up with potato soup.
Stage 6 - 30 min.

When they are well cooked, remove the chips gently and drain on a rack.
As soon as they are cool, put the rack in the fridge for at least 30 minutes to dry the chips.
As soon as they are cool, put the rack in the fridge for at least 30 minutes to dry the chips.
Stage 7
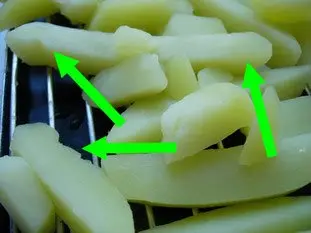
You can see on this close-up what I mentioned earlier: the chips are well cooked and their edges (as shown by the arrows) have started to break up. This is important as these little irregularities give a noticable extra crunch to the chips when fried.
Stage 8 - 5 min.

Stage 2: first frying.
Fry the chips for the first time in very hot oil for 5 minutes.
Do this in batches if necessary.
Fry the chips for the first time in very hot oil for 5 minutes.
Do this in batches if necessary.
Stage 9 - 30 min.
The aim is not to cook the chips, just part cook them. They should be barely coloured.
Drain them thoroughly, then tip them onto the rack again, and leave to wait for at least 30 minutes.
Drain them thoroughly, then tip them onto the rack again, and leave to wait for at least 30 minutes.
Stage 10 - 5 min.
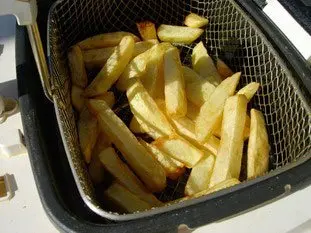
Stage 3: second and final frying.
Put the chips back into the hot oil for about 5 minutes, removing them as soon as they have browned to your liking.
Put the chips back into the hot oil for about 5 minutes, removing them as soon as they have browned to your liking.
Stage 11 - 2 min.
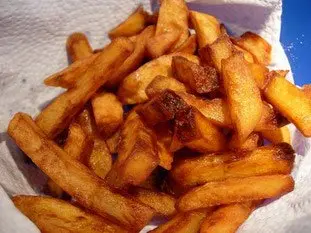
Tip into a dish lined with a layer of absorbant paper, salt lightly and serve without delay.
Remarks
If you are used to frozen chips, you'll be amazed by the taste of these. It's a fair bit of work, but the result is worth it.
You can improve on stage 2 by putting the pre-cooked chips in the fridge for at least 30 minutes.
Stage 1 and stage 2 can be done hours beforehand, even the previous day. You can freeze the chips after stage 1, maybe even after stage 2, but I've not yet tried this.
For me, nothing goes better with these chips than béarnaise sauce. In a good restaurant they are already great, but home made: a pure delight.
Source
Inspired by Heston Blumenthal.
Nutritional information
| Whole recipe | |||
|---|---|---|---|
| Energetic value | Proteins | Carbohydrates | Fats |
| 850 Kcal or 3,559 Kj | 20 gr | 190 gr | 1 gr |
| 43 % | 8 % | 18 % | <1 % |
| Per 100 g | |||
|---|---|---|---|
| Energetic value | Proteins | Carbohydrates | Fats |
| 85 Kcal or 356 Kj | 2 gr | 19 gr | < 1 gr |
| 4 % | 1 % | 2 % | <1 % |
| Per person | |||
|---|---|---|---|
| Energetic value | Proteins | Carbohydrates | Fats |
| 142 Kcal or 595 Kj | 3 gr | 32 gr | < 1 gr |
| 7 % | 1 % | 3 % | <1 % |
How much will it cost?
- For 6 people : 1.00 €
- Per person : 0.17 €
Note: Be careful, these prices are only an estimate, you can consult the table of prices by ingredients used for this estimate.
This recipe uses (among others)
 | Potatoes: You can get more informations, or check-out other recipes which use it, for example: Potato tortilla (Spanish omelette), Turnip top soup, Gratin "grilled inside", Hearty potato and ham gratin, Potato wallets, ... All |
 | Salt: You can get more informations, or check-out other recipes which use it, for example: Avocado with gravlax, Minestrone, Lumberjack turnovers, Late Winter Soup with Fresh Spinach, Tandoori-flavoured chicken with leeks, ... All |
Other recipes you may also like
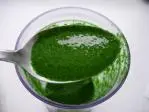
Green parsley sauce
This sauce, with a great parsley taste, is perfect with steamed vegetables or fish. At the bottom you will find the coulis version of this recipe.496K 44.3 23 min. February 21th 2011
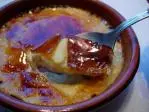
Crème brulée
Crème brûlée (burned cream) is quite easy to prepare: it's a simple egg-cream dessert. The only difficulty is in making the delicious crunchy caramel layer on top. The perfect crème brulée (for me) is a cold and soft cream, with on top a nice hot caramel crust. This is a completely new version...1.6M 74.3 4 hours 38 min. December 31th 2011
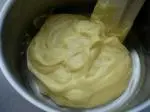
Confectioner's custard (Crème pâtissière, or French pastry cream)
Quite similar to crème anglaise but much thicker. It is used in many pastries like choux pastry (pâte à choux) or millefeuille.734K 313.7 36 min. January 27th 2017
French dressing (vinaigrette)
Here is a very simple recipe, but it could completely transform, maybe even transcend, your salad.1.0M4.5 7 min. July 7th 2011
How to prepare spinach
For most people (and me most of all), spinach brings back bad memories of canteens... But, well prepared, it's a fine and delicate vegetable which goes remarkably well with scrambled eggs, fish, and many another things. Here are two ways of preparing it.3.4M3.5 1 hour 9 min. June 5th 2015
News list of cooking-ez.com
Sign up to receive the latest recipes (next batch due to be sent on 2024-04-28)
Note: We'll never share your e-mail address with anyone else.
Post your comment or question
Follow this recipe (as 8 people already do)
If you are interested in this recipe, you can "follow" it, by entering your email address here. You will then receive a notification immediately each time the recipe is modified or a new comment is added. Please note that you will need to confirm this following.
Note: We'll never share your e-mail address with anyone else.
Alternatively: you can subscribe to the mailing list of cooling-ez.com , you will receive a e-mail for each new recipe published on the site.