Construction
Using
- Some advice on heating
- Cooking with open fire
- Cooking with closed fire
- Make some bread!
- Slash your bread
- Have a good pizza-party
- Recipes around the bread oven
The principle of the Bread oven
Unlike a conventional gas or electric kitchen oven with a constant source of heat, in a wood-fired bread oven we start by lighting a fire in it, leaving the door open, until the right temperature is reached. During this period, the whole mass of the oven (made with firebricks or equivalent) stores up heat. Then we remove the fire and embers, put bread dough in, and close the door. The accumulated heat is givien off by the oven fabric, and bakes the dough into bread.This method, called "closed fire", is used for bread, cakes, brioches, croissants etc.
You can also use the "open fire" method, still heating the oven as before, but leaving the embers in, and door open, during cooking. This method is used for pizzas and pitta bread.
Ignition, oven heating and baking
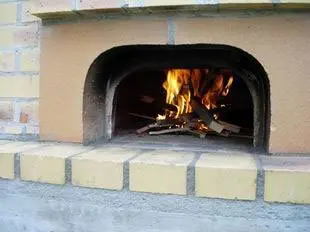
Start by building a small fire in the middle of the oven, using newspaper, cagette, bundle, kindling or a cube of firelighter.
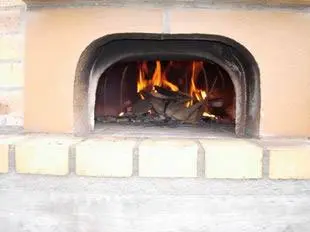
As soon as the fire is well under way, we build it up with larger and larger pieces of wood, until we arrive at small logs (in Franche-Comté, we call them "charbonnette"), but split to facilitate combustion.
You don't want to go too big, as you're looking for flames and embers.
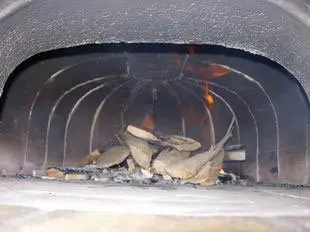
At first, the oven walls become black with soot, which is normal.
The oven is fed for one and a half to two hours.
At the end of this time, with the heat, the oven pyrolyzes: it cleans itself and becomes all nice and clean (magic!).
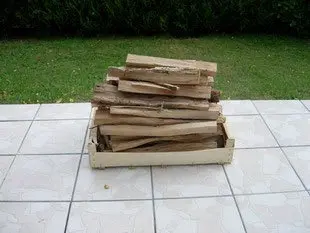
data-ligne="Wood consumption is quite difficult to quantify, so to give you an idea, here's the "pile" of wood before you start heating...

...and here's what's left at the end.
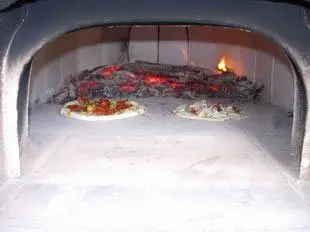
From this point on, you can cook over an open fire: pizzas, for example, always leaving a little fire in the bottom or on the sides of the hearth.
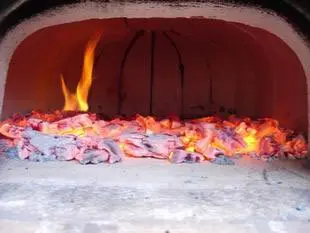
Once all the pizzas are cooked, spread the embers over the entire surface of the oven, and leave for an hour or so to perfect the temperature.
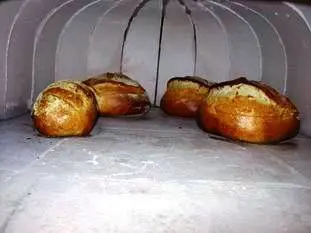
Then remove all the embers, sweep up the remaining ashes and damp mop the hearth to finish cleaning it.
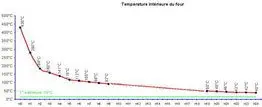
Let the temperature drop to around 250°C or 482°F, leaving the oven door closed (for 30 to 60 minutes or more, depending on the length of the heating process).
You can then move on to baking with the oven closed: to make bread.
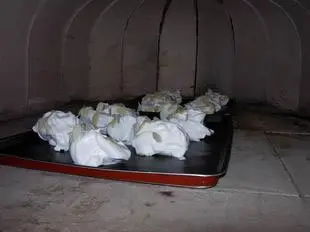
If you're planning to bake meringues, wait until the oven has cooled down to a low temperature (100°C maximum) before placing them in the oven, so you can be sure of obtaining beautiful, white meringues.
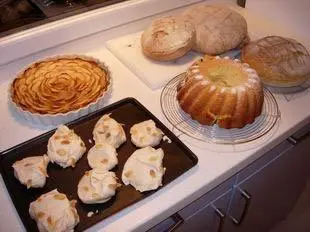
Ideally, of course, you'd like to optimize the oven heating process. Here's an example of the timetable and some of the results:
- 8:30 am: Bread kneading.
- 9:00 a.m.: Start of bread punching.
- 10:00 a.m.: Oven ignition, feed until noon.
- 12:00: Pre-baking of pizza dough bases.
- 12:30 p.m.: Pizzas baked.
- 1:30 p.m.: Ember spread over the entire oven floor.
- 2pm-2.30pm: Ember removed, temperature lowered.
- 3:00 p.m.: Put bread dough in the oven.
- 3:30 pm: Breads removed, brioches, cakes and tarts put in the oven.
- Around 5:00 pm: Put meringues and/or fruit to dry in the oven.
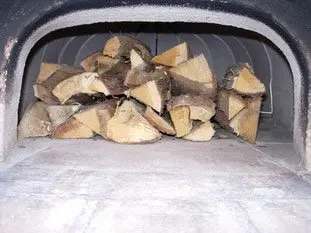
And last but not least, the amateur baker knows that the next heating will be much better if he stores his wood in the oven, to take advantage of the remaining heat to dry it.
Recipes around the bread oven
See list here.Some books and links
- Fayol company website, who sell great bread ovens "Le Panyol"
- Barbier company website, world specialist in wooden bread oven utensils: www.societe-barbier.com (in French)
- "Faites votre pain au levain naturel" by Henri Granier (Do your own natural leaven bread in French).
- "Le livre du boulanger" (Baker's book in French) by Jean-Yves Guignard and Pierre Lesjean.
- "L'amour du pain" (The love of bread in French) by Philippe André and Marc Paygnard.
- "60 secrets de boulangerie et pâtisserie" (60 secrets of baking and pastry in French) by Thomas Marie and Christian Odet.
Marcel Pagnol
"I will make you bread like you have never seen before. I will knead each batch half an hour longer, and I will mix rosemary in the faggots for heating the oven. And while it bakes, I will not sleep as usual, but I will open the door every five minutes and not take my eyes off it. I will make you a bread so good that it will no longer serve as an accompaniment to other things, but will be food for gourmets... You will no longer say `I have eaten cheese on a slice of bread', but `I've enjoyed a slice of bread under some cheese'. And each day, on top of my usual batch, I will knead 5 kilos for the poor... And in each loaf that I make, there will be great friendship and abundant thanks".I love the dialogues by French author and director Marcel Pagnol in general, and especially this one, from the film "The Baker's Wife".
