Finishing touches
Measuring temperature
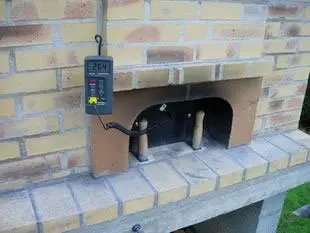
I'm not very good at using old bakers' tricks to tell when the oven is at the right temperature for bread. So I prefer to use a thermometer.
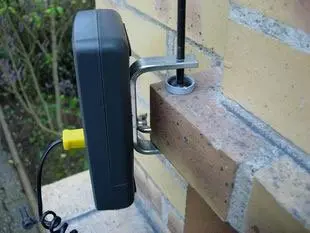
Special oven thermometers are rather expensive (about 70 euros) and use a probe of 20 cm (10 inches) or more, not very easy with a Panyol door.
That's why I decided to use an electronic thermometer cheaper (Half the price of a special oven one), fixed on a brick of the chimney.
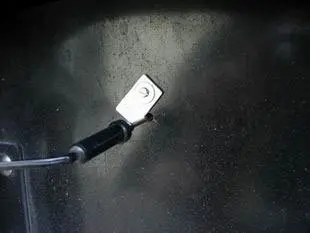
It's necessary to make a hole in the door to pass the probe through. To do this:
- Drill a hole 7 mm diameter in the "stone" panel of the door.
- Drill a hole 5 mm diameter in the metal door panel through the first hole.
- If possible add a shutter to close the hole when the probe is out. For this, drill a second hole 2 cm (1 inch) above the first one for a bolt and screw nut to hold the shutter (you need to undo the two 10 mm screw nuts fixing the stone panel).
A removable table
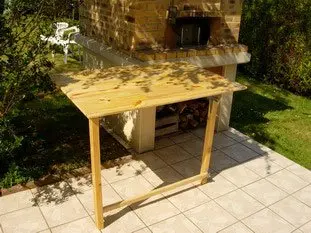
The idea was to have a table that could be added only when needed, during " pizza-party" or " pitta-party" in the summer, or at baking time when making bread.
Here's how we did it:
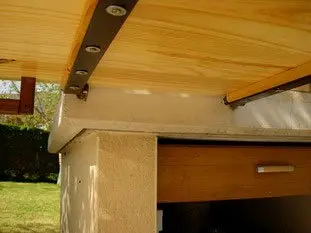
we screwed metal hinges used for wooden window shutters onto a large panel of laminated wood.
The corresponding hinge posts were fixed into the slab in front of the oven.
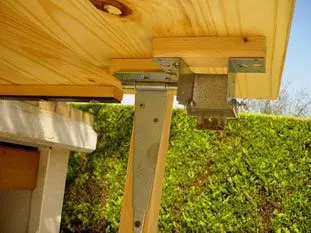
The table only has two legs, and the one nearer the oven is off-centre so as not to get in the baker's way.
The two legs are also hinged so that they can be folded for storage.
A horizontal wooden bar prevents the legs being folded accidentally.
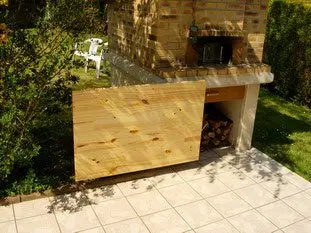
The table can be collapsed quickly by folding the legs.
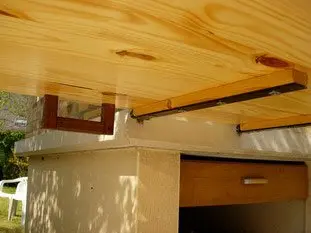
A handle was fixed to the underside for ease of carrying.
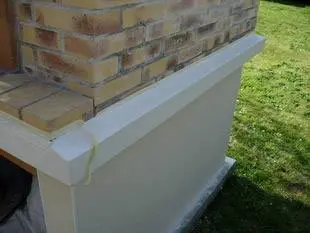
Rendering
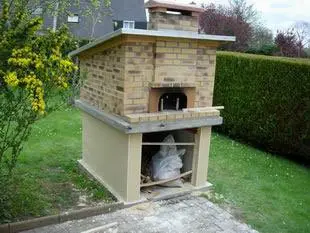
A basic masonry technique, which improves the appearence of the oven.
Note: Special angles strips have been used.
Painting
Final stage, to finish the appearence of the oven and hide the grey concrete.
We used a classic masonry paint for exterior walls.
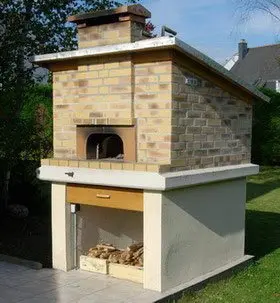
That's it, (almost) finished now...
Next: Cooking utensils.
Preceding: Roof.
If only I had known...
Afterwards we always have some small regrets, we think: I should have done this or that, removed that, raised this, lowered that, etc. To avoid you having to do this, here are a few details that could be changed on this oven:- Make the sole higher (one more row of blocks), ideally have the sole at your elbow height.
- Make the platform in front of the oven larger, two fire bricks instead of one.
- Build in a permanent thermometer during construction, instead of using a removable one.