This site uses only a few technical cookies necessary for its operation. By continuing to browse, you accept their use.
To find out more...
To find out more...
Home-made breadcrumb coating

The crispy crust on many fried (or baked) foods comes from a breadcrumb coating. You can buy this, of course, but it's easy and much better to make your own at home.
For one thing, you will know excatly what's in it – just bread – which is not the case for the commercial product. This is also a great way to use up bits of dry bread that would otherwise go to waste.
For one thing, you will know excatly what's in it – just bread – which is not the case for the commercial product. This is also a great way to use up bits of dry bread that would otherwise go to waste.
137 K 3.8/5 (32 reviews)606521
Last modified on: May 26th 2024
For 180 g, you will need:
- 1
 200 g bread
 - Total weight: 200 grams
Times for this recipe
Preparation
7 min.
Cooking
1 hour
All in all
1 hour 7 min.
When should you start or finish this recipe?
If you start now, at , you will finish around : ?.Change start time
To finish around 7pm, you'll need to have started before: .Change end time
Step by step recipe
Stage 1 - ⌛ 3 min.

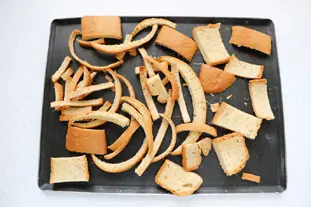
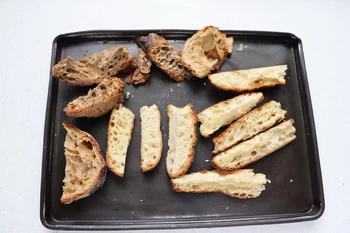
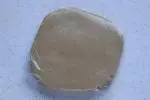
Cut 200 g bread into pieces no bigger than your thumb.
Rescue crusts and dry ends of loaves to avoid waste. Here it is crusts of sandwich bread.
Spread the pieces of bread on a baking sheet.
Rescue crusts and dry ends of loaves to avoid waste. Here it is crusts of sandwich bread.
Spread the pieces of bread on a baking sheet.
Stage 2 - ⌛ 1 hour
Put in the oven at 210°F (100°C) fro 1 to 2 hours. The idea is to dry out the bread without toasting it, so that the breadcrumbs will keep well.
Stage 3 - ⌛ 2 min.
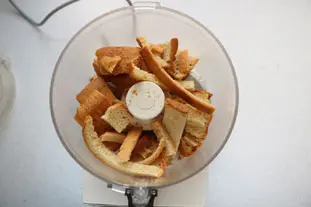
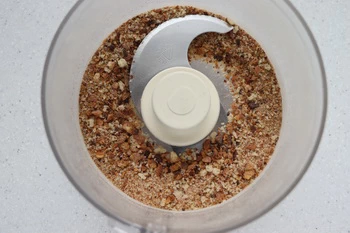
After this time, leave to cool, then tip the bread into a food-processor or blender goblet.
Stage 4 - ⌛ 2 min.
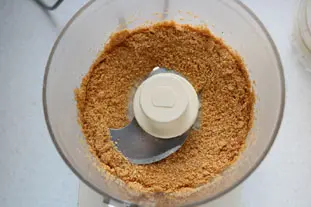
Blend until the crumbs are as coarse or as fine as you want them.
Stage 5
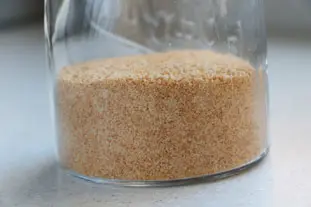
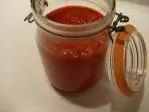
Keep dry in an airtight jar.
Stage 6
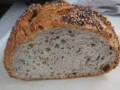
Note that you can also use leftover bread that isn't sandwich bread, as in this photo with baguette, pain de campagne, Arthur's pavé...
Stage 7
... no problem, your breadcrumbs will be even tastier, it will just take a little longer to obtain a fine enough powder.
Remarks
Another option for drying: use the residual heat of the oven after cooking something (such as a roast). As soon as you have finished cooking, turn the oven off and put in the tray of bread for 1 hour.
Keeping: Several months in an airtight jar.
Source: Home made.
Support the site ❤️
This site has been around for years, with no advertising, no pop-ups, no traps, no information gathering, and I maintain it alone, out of passion.
If you liked this recipe, your support helps me to keep going.
Support cuisine-facile.com
If you liked this recipe, your support helps me to keep going.
Support cuisine-facile.com
Nutritional information
| Proteins | Carbohydrates | Fats | Calories | Energy | |
|---|---|---|---|---|---|
| Per 100 g | 142 g RDI=218 % | 1,149 g RDI=434 % | 21 g RDI=29 % | 230 kcal RDI=12 % | 963 kJ RDI=12 % |
| Whole recipe | 284 g RDI=437 % | 2,298 g RDI=867 % | 42 g RDI=58 % | 460 kcal RDI=23 % | 1,926 kJ RDI=23 % |
How much will it cost?
For 180 g
0.25 €
Per Home-made breadcrumb coating
0.05 €
Note: Be careful, these prices are only an estimate, you can consult the table of prices by ingredients used for this estimate.
This recipe uses (among others)
Bread
You can get more informations, or check-out other recipes which use it, for example: Cornouaillaise saladCroque-monsieur gourmandBaby spinach saladNanou's red cabbage saladGreen and red salad with sardines and eggs mimosa See all 77 other
Other recipes you may also like


News list of cooking-ez.com
Sign up to receive the latest recipes, next batch due to be sent on 2026-07-26
We'll never share your e-mail address with anyone else.
Post a comment or question
Follow this recipe
Receive an e-mail as soon as this recipe is modified or receives a new comment.
We'll never share your e-mail address with anyone else.
Alternatively: you can subscribe to the mailing list of cooling-ez.com , you will receive a e-mail for each new recipe published on the site.