French croissants
In this famous and highly technical recipe from a piece of yeast-based flaky dough we are going to cut and shape ("roll") croissants.
Last modified on: June 26th 2019
For 30 croissants, you will need:
- 1
 4 lb + 15.2 oz yeast-based flaky dough (for croissants)
 - 2
 3.2 oz beaten egg
Change these quantities to make:
Change measures:
Times for this recipe
Preparation: 45 min.
Resting: 1 hour 30 min.
Cooking: 20 min.
All in all: 2 hours 35 min.
If you start now, at , you will finish around : ?.Change start time
To finish around 7pm, you'll need to have started before: .Change end time
Step by step recipe
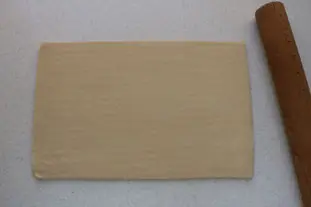
Roll out 4 lb + 15.2 oz yeast-based flaky dough (for croissants) really cold into a 10 inch (25 cm) wide strip.
The length will depend on the number of croissant you are going to make. Ideally, it should be 0.2 inch (4 mm) thick.
The length will depend on the number of croissant you are going to make. Ideally, it should be 0.2 inch (4 mm) thick.
Cutting out
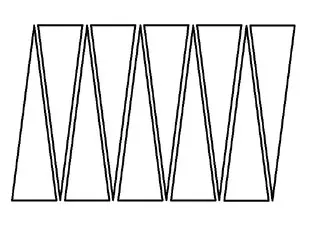
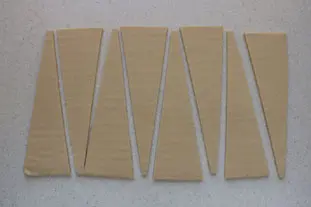
To make the croissants, you need to cut the dough strip across into elongated triangles with a base of 3 inches (8 cm).There are 2 ways of doing this: either isoceles triangles, as shown here...
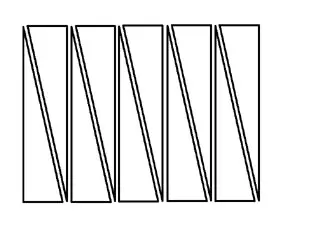
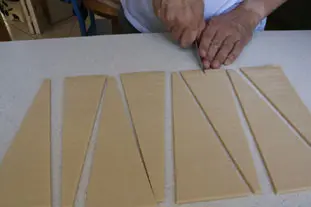
...or right-angle triangles as in this diagram.
Choose whichever method you prefer. The right-angle method is traditionally reckoned to be simpler.
Choose whichever method you prefer. The right-angle method is traditionally reckoned to be simpler.
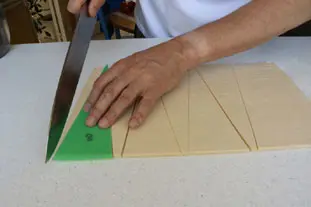
Cut the whole strip of dough into triangles. Each triangle should ideally weigh 70 gr.
Note: as with any viennoiseries, cold is your friend. Whenever you feel the dough starting to soften too much, declare a "cooling pause", transfer your triangles onto a baking sheet and leave in the freezer for 15 minutes to firm up.
Note: as with any viennoiseries, cold is your friend. Whenever you feel the dough starting to soften too much, declare a "cooling pause", transfer your triangles onto a baking sheet and leave in the freezer for 15 minutes to firm up.
There are 2 ways to shape the croissants:
1) "Straight", where the rolled-up croissants are not curved. This is the simpler method.
2) "Curved", where the finished croissants are crescent-shaped, and the dough is cut to achieve this curve. This is a trickier method.
If you wish to make curved croissants, make a 1 inch (2 cm) cut in the middle of the base edge of each triangle.
Shaping straight croissants
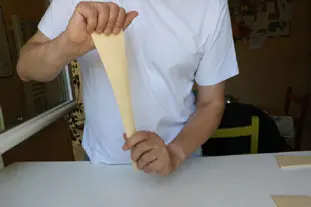
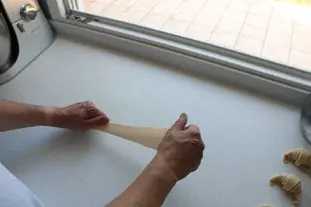
Take a triangle of dough and stretch gently lengthways several times. It should increase from 10 inches (25 cm) to about 14 inches(35 cm) long.
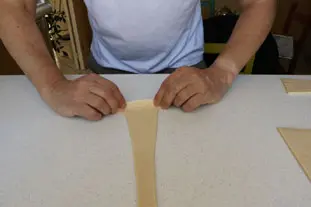
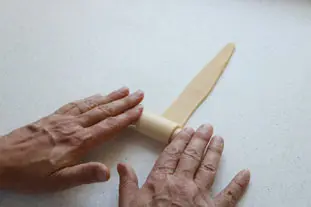
Lay this triangle on the worktop with the short base edge nearest you.
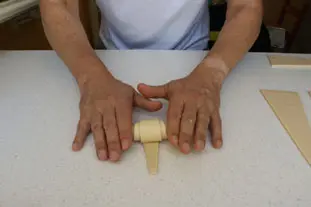
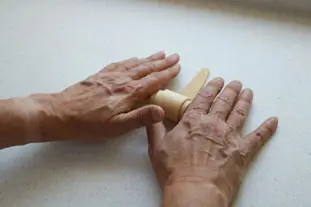
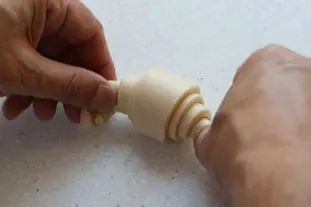
Stretch the two points of this edge gently outwards and begin rolling...
Stretch the two points of this edge gently outwards and begin rolling...
Shaping curved croissants
Take a triangle of dough with a cut in the base edge. Stretch gently lengthways several times until it increases from 10 inches (25 cm) to about 14 inches (35 cm) long.Lay the dough triangle on the worktop with the short base edge nearest you.
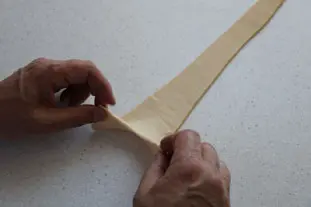
Stretch the two points of this edge outwards (don't worry if the dough begins to tear), making use of the cut to separate the two parts that will form the croissant's "horns". And start to roll...
Stretch the two points of this edge outwards (don't worry if the dough begins to tear), making use of the cut to separate the two parts that will form the croissant's "horns". And start to roll...
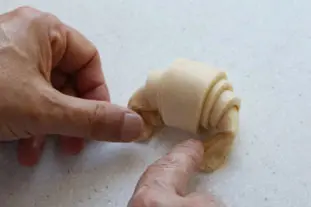
And bend these round inwards towards the front.
Fix them in shape by crushing the ends gently with your finger.
Fix them in shape by crushing the ends gently with your finger.
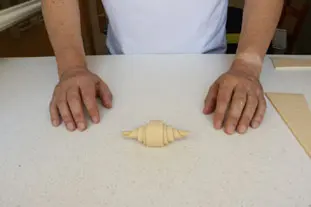
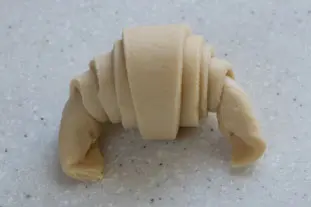
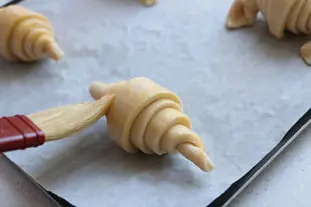
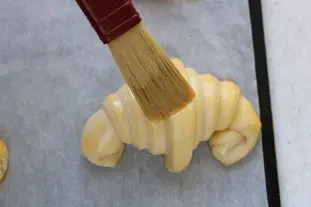
Roll up all the triangles like this and arrange on cooking parchment laid on a baking sheet.
Important: the croissants will swell up a lot during cooking, so leave plenty of space between them.
Important: the croissants will swell up a lot during cooking, so leave plenty of space between them.
Remarks
Nothing need go to waste: any leftover bits of dough can be used to make soured dough for the next time you make croissants. Weigh 100 g, wrap in plastic film (with a label) and freeze until needed.
Keeping: A few hours, no more.
Source: Based on a recipe by master baker Sébastien Ropers of the Pen ar bread bakery.
Nutritional information
| Proteins (gr) | Carbohydrates (gr) | Fats (gr) | Energy value (in k-calories) | Energy value (in k-joules) | |
|---|---|---|---|---|---|
| Whole recipe | 1,980 RDI=760 % | 12,920 RDI=1,220 % | 7,020 RDI=1,060 % | 122,730 RDI=6,140 % | 513,840 RDI: 6,140 % |
| Per 100 g | 80 RDI=30 % | 550 RDI=50 % | 300 RDI=50 % | 5,240 RDI=260 % | 21,960 RDI: 260 % |
| Per croissants | 70 RDI=30 % | 430 RDI=40 % | 230 RDI=40 % | 4,090 RDI=210 % | 17,130 RDI: 210 % |
How much will it cost?
- For 30 croissants : 7.60 €
- Per croissants : 0.30 €
Note: Be careful, these prices are only an estimate, you can consult the table of prices by ingredients used for this estimate.
This recipe uses (among others)

Yeast-based flaky dough (for croissants)
You can get more informations, or check-out other recipes which use it, for example: Baker's apple soles, Mirlitons of Guipavas, Croissant dough apples, Pistachio and goji pinwheels, Raisin breads (pains aux raisins), ... See them all 6

Beaten egg
You can get more informations, or check-out other recipes which use it, for example: Shortbread tart with sweet apricots and rosemary, Diamond biscuits, Epiphany galette, Chinois, How to seal a terrine or casserole dish, ... See them all 80
Other recipes you may also like
New tiramisu
This new version of tiramisu is easier, and in my opinion much better. You will certainly appreciate, like me, the light creamy taste, this time presented in brandy goblets. January 19th 2015409 K3.3 55 min.
Pancake batter
Here is a pancake batter that is a little more sophisticated than the traditional version. The pancakes will be tastier with a softer texture. February 2nd 2020365 K3.8 15 min.
Almond cream
Light and delicious, it is used in a lot of desserts like tarts, cakes and pies (epiphany galette). August 31th 2025476 K 25 20 min.
Arizona cupcakes
Cupcakes are small sponge cakes. In their original American version, they are usually decorated with brightly coloured icing. Here's a version inspired by the famous saguaro cactus, so common in Arizona. October 13th 2010216 K 14.6 1 hour 50 min.
Moist chocolate cake
A moist, loaf-shaped cake with all the chocolate flavour that comes from a double dose: melted chocolate and cocoa powder. August 28th 2025107 K5 1 hour 10 min.
News list of cooking-ez.com
Sign up to receive the latest recipes (next batch due to be sent on 2025-09-21)
Note: We'll never share your e-mail address with anyone else.
Follow this recipe (as 13 people already do)
If you are interested in this recipe, you can "follow" it, by entering your email address here. You will then receive a notification immediately each time the recipe is modified or a new comment is added. Please note that you will need to confirm this following.
Note: We'll never share your e-mail address with anyone else.
Alternatively: you can subscribe to the mailing list of cooling-ez.com , you will receive a e-mail for each new recipe published on the site.




The 2 comments already posted on this recipe