Clarified butter
This is a way of melting butter to eliminate all the impurities.
The clarified butter can then be heated without spoiling, and is more digestible.
It is ideal for cooking at high temperatures where small black specks would spoil the appearance, or for emulsified sauces like béarnaise or mousseline.
The clarified butter can then be heated without spoiling, and is more digestible.
It is ideal for cooking at high temperatures where small black specks would spoil the appearance, or for emulsified sauces like béarnaise or mousseline.
489 K 4.2/5 (55 reviews)736854
Last modified on: June 21th 2017
For 200 g, you will need:
- 1
 250 g butter
 - Total weight: 250 grams
Times for this recipe
Preparation
5 min.
Resting
2 hours
Cooking
9 min.
All in all
2 hours 15 min.
When should you start or finish this recipe?
If you start now, at , you will finish around : ?.Change start time
To finish around 7pm, you'll need to have started before: .Change end time
Step by step recipe
Stage 1 - ⌛ 5 min.
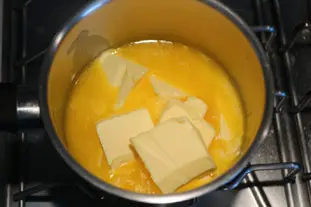
Put 250 g butter cut in pieces in a pan on medium heat, allow to melt then wait until it begin to boils.
Stage 2 - ⌛ 1 min.

Skim off the foam which forms on the surface with a tablespoon.
Stage 3 - ⌛ 2 hours

Pour the content of the pan in a bowl.
Let cool, then put in the fridge for 2 hours at least.
Let cool, then put in the fridge for 2 hours at least.
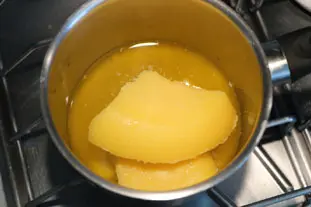
Stage 4 - ⌛ 1 min.

Press firmly on the butter to unmould.
Stage 5 - ⌛ 1 min.

You can see that butter impurity are white, and separate from the butter who is yellow.
Stage 6 - ⌛ 1 min.

Rinse butter under cold water to remove last impurity.
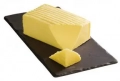
Stage 7

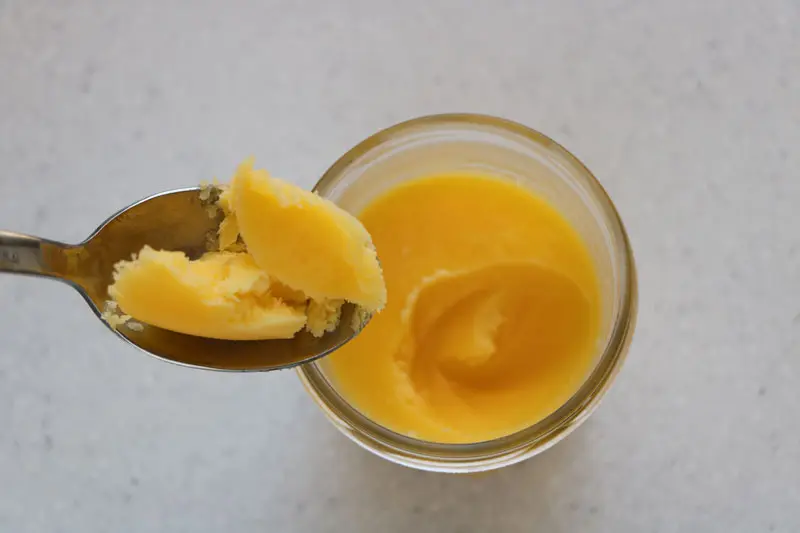
You should get a clean yellow block of clarified butter.
You can use it from now, but it's more convenient to make it melt again.
You can use it from now, but it's more convenient to make it melt again.
Stage 8 - ⌛ 4 min.
Break the block in pieces, and make melt on slow fire.
Stage 9 - ⌛ 1 min.

Then pour in a jar.
Stage 10

Let cool and put in the fridge.
It's done. You can seal the jar, and keep in the fridge for several weeks with no problem and just use what you need when you need.
It's done. You can seal the jar, and keep in the fridge for several weeks with no problem and just use what you need when you need.
Remarks
As it keeps very well, it is worth making a large quantity at a time, then keeping it in the fridge in a sealed container.
Keeping: A few weeks in the fridge in a closed jar.
Source: From a tip of chef Jacques Thorel.
Support the site ❤️
This site has been around for years, with no advertising, no pop-ups, no traps, no information gathering, and I maintain it alone, out of passion.
If you liked this recipe, your support helps me to keep going.
Support cuisine-facile.com
If you liked this recipe, your support helps me to keep going.
Support cuisine-facile.com
Nutritional information
| Proteins | Carbohydrates | Fats | Calories | Energy | |
|---|---|---|---|---|---|
| Per 100 g | 0 g | 0 g | 84 g RDI=115 % | 759 kcal RDI=38 % | 3,178 kJ RDI=38 % |
| Whole recipe | 1 g RDI=3 % | 0 g | 210 g RDI=288 % | 1,897 kcal RDI=95 % | 7,944 kJ RDI=95 % |
How much will it cost?
For 200 g
1.75 €
Per Clarified butter
0.05 €
Note: Be careful, these prices are only an estimate, you can consult the table of prices by ingredients used for this estimate.
Some other recipes using this recipeSee all 34 other

Corn salad with croutons
Corn salad (or lamb's lettuce) leaves mixed with chopped hard-boiled eggs, mushrooms, spring onions, butter-fried croutons, and - of course - a good vinaigrette dressing.
146 K5 55 min.

Chilli langoustines
The langoustines in this recipe are cooked in two stages: boiled briefly in salted water, then sautéed before being spiced and flambéed in cognac. They are served here with a creamy sauce and potato grenaille.
67 K5 1 hour 9 min.

Rolled chestnut and apple brioche
This rolled brioche is made with a special dough, using a mixture of two flours: ordinary plain flour and chestnut flour. The prepared dough is then rolled up around a filling of apples sautéed with brown sugar.
71 K 24 15 hours 55 min.

Celeriac in cream and mustard sauce
The celeriac in this dish is cooked in two stages: pan-fried first, then braised in cream with mustard. It can be enjoyed as the main feature with rice or cous-cous, for example, or served to accompany meat.
59 K 45 min.

European glass
A little dessert that's rather long to make, but which will always impress your guests. Layered in a glass: a jellied red fruit coulis, a layer of pineapple charlotte cream, a layer of kiwi coulis, topped with a peeled clementine segment. It's "european" because it resembles the italian flag, and in...
248 K5 2 hours 30 min.
This recipe uses (among others)
Butter
Like these other recipes: Apple and almond cakeRoscoff loafCannelésAuvergne soupTyrolean apple crumble See all 501 other
Other recipes you may also like


News list of cooking-ez.com
Sign up to receive the latest recipes, next batch due to be sent on 2026-05-17
We'll never share your e-mail address with anyone else.
Post a comment or question
Follow this recipe (as 3 people already do)
Receive an e-mail as soon as this recipe is modified or receives a new comment.
We'll never share your e-mail address with anyone else.
Alternatively: you can subscribe to the mailing list of cooling-ez.com , you will receive a e-mail for each new recipe published on the site.