This site uses only a few technical cookies necessary for its operation. By continuing to browse, you accept their use.
To find out more...
To find out more...
Almond tuiles
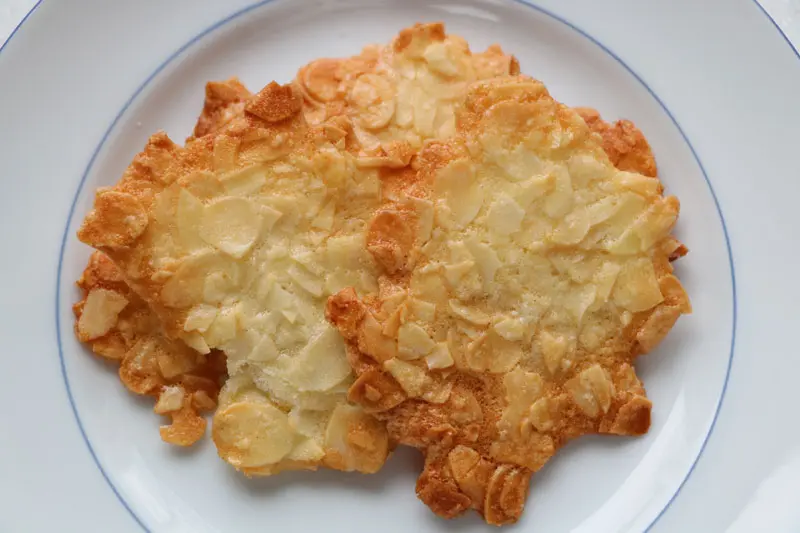
These delicious little biscuits ("tiles" in French) get their crunch and lightness from the use of flaked almonds rather than ground.
It is not difficult to succeed, you just need to work fast after taking them out of the oven.
It is not difficult to succeed, you just need to work fast after taking them out of the oven.
407 K 4.3/5 (46 reviews)661610
Last modified on: August 21th 2019
For 30 tuiles, you will need:
- 1
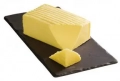
 20 g butter
 - 2
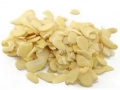
 100 g flakeds almonds
 - 3
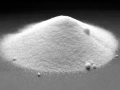
 75 g caster sugar
 - 4
 15 g flour
 - 5
 60 g egg white
 - 6
 5 tablespoons milk
 - Total weight: 345 grams
Times for this recipe
Preparation
30 min.
Resting
30 min.
Cooking
20 min.
All in all
1 hour 20 min.
When should you start or finish this recipe?
If you start now, at , you will finish around : ?.Change start time
To finish around 7pm, you'll need to have started before: .Change end time
Step by step recipe
Stage 1 - ⌛ 3 min.

Stage 2 - ⌛ 2 min.
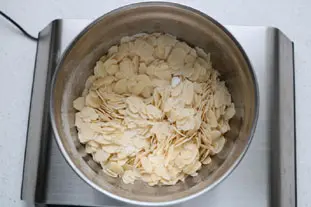
In a bowl mix 100 g flakeds almonds, 75 g caster sugar and 15 g flour.
Stage 3 - ⌛ 30 min.
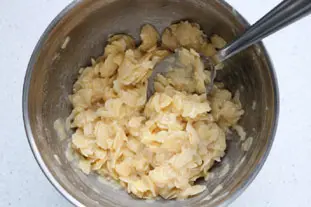
Add melted butter and 60 g egg white, mix well, then refrigerate for approximately 30 minutes.
Stage 4 - ⌛ 5 min.
Shaping tuiles
Preheat the oven to 360°F (180°C).
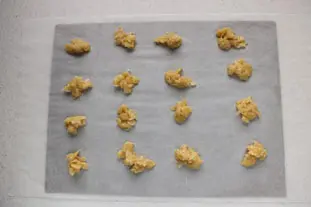
Put a cooking parchment on a baking sheet, deposit small heaps of mixture, approximately the size of a 2 € (or £2) coin.
They should not be too close together because they will spread out flat.
Stage 5
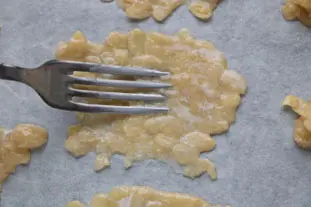
With a fork dipped in milk, flatten each heap of mixture carefully.
The more your future tuile is flattened, the crisper and thinner it will be after cooking.
The more your future tuile is flattened, the crisper and thinner it will be after cooking.
Stage 6
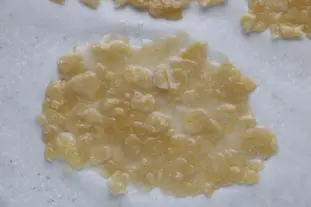
Don't worry if you have some "holes" in the middle of tuiles, they won't show after cooking.
Stage 7 - ⌛ 15 min.

If you prefer regular shape, still using the fork dipped in milk, even up the edges of your future tuiles.
Stage 8 - ⌛ 15 min.
Baking
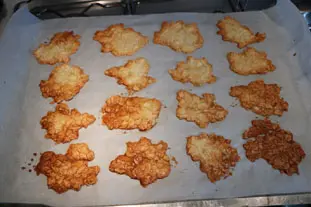
Do this with all the small heaps.And cook in the oven for 10/15 minutes.
Watch carefully for colouration, especially towards the end of cooking time. The ideal tuile is (according to some) brown around the edge, and still quite pale in the middle.
Stage 9 - ⌛ 5 min.

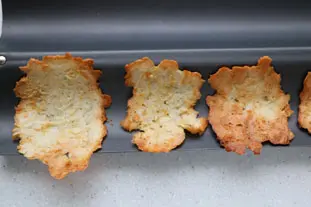
As soon as the tuiles are cooked, you need to remove the baking sheet from the oven as quickly as possible, because hot the tuiles are still soft and easy to handle. But as soon as they cool, they harden and become brittle. So as quickly as possible, remove tuiles from paper using a palette-knife, and place them on a rack to cool.
If you wait too long, they will cool on the paper and stick to it firmly, and then will inevitably break when you try to separate them, which would be a pity...
If you wait too long, they will cool on the paper and stick to it firmly, and then will inevitably break when you try to separate them, which would be a pity...
Stage 10

Wait until they have cooled and become very crisp before eating.
Stage 11 - ⌛ 1 min.
Curved tuiles
If you want to have "professional" tuiles, i.e. evenly curved tuiles, as soon as they come off the paper you must mould them over something round like a glass, a baguette mould or even a proper tuile mould which is a kind of non-stick channel. The tuile (still hot) will mould under its own weight and set to this shape as it cools.
Stage 12 - ⌛ 2 min.

Let cool before unmould, curved.
Remarks
The tuiles should be kept in an airtight tin, but unfortunately not for very long as they will go soft.
For the ideal tuile about which I spoke before, it is also a matter of taste, I am the only one at home to prefer them well cooked (no "white" in the middle), well browned and very crisp.
To serve an ice cream or a sorbet with a tuile stuck in the top is a very very good idea.
For the ideal tuile about which I spoke before, it is also a matter of taste, I am the only one at home to prefer them well cooked (no "white" in the middle), well browned and very crisp.
To serve an ice cream or a sorbet with a tuile stuck in the top is a very very good idea.
Keeping: 1 or 2 days in a closed metal box.
Source: After Gaston Lenôtre, and friendly dedicated to Séverine, Stéphnaie, Danielle and Claudie.
Support the site ❤️
This site has been around for years, with no advertising, no pop-ups, no traps, no information gathering, and I maintain it alone, out of passion.
If you liked this recipe, your support helps me to keep going.
Support cuisine-facile.com
If you liked this recipe, your support helps me to keep going.
Support cuisine-facile.com
Nutritional information
| Proteins | Carbohydrates | Fats | Calories | Energy | |
|---|---|---|---|---|---|
| Per 100 g | 7 g RDI=12 % | 30 g RDI=12 % | 21 g RDI=30 % | 352 kcal RDI=18 % | 1,477 kJ RDI=18 % |
| Per tuiles | 0 g | 3 g RDI=1 % | 2 g RDI=3 % | 40 kcal RDI=2 % | 170 kJ RDI=2 % |
| Whole recipe | 27 g RDI=42 % | 106 g RDI=40 % | 75 g RDI=104 % | 1,217 kcal RDI=61 % | 5,096 kJ RDI=61 % |
How much will it cost?
For 30 tuiles
2.00 €
Per tuiles
0.10 €
Note: Be careful, these prices are only an estimate, you can consult the table of prices by ingredients used for this estimate.
Some other recipes using this recipe

Warm apple feuillantines
It's a rather long recipe but which never fails to impress, perfect for a special dinner party. It's made up of 3 circles: one almond "tuile", 2 of caramelized brik sheets, with a caramelized apple layer between each, whipped cream on top, and custard all around. Everything, except whipped cream,...
344 K5 3 hours 9 min.
This recipe uses (among others)
Flakeds almonds
Like these other recipes: BenoîtonBroad bean salad with ParmesanParis-BrestPea and avocado saladSoft apple cookies See all 25 other
Caster sugar
Like these other recipes: Lime crémeuxRice pudding with fruit and nutsBrioche royalePavlovaChocolate sauce See all 381 other

Egg white
Butter
Other recipes you may also like


News list of cooking-ez.com
Sign up to receive the latest recipes, next batch due to be sent on 2026-07-26
We'll never share your e-mail address with anyone else.
Post a comment or question
Follow this recipe (as 5 people already do)
Receive an e-mail as soon as this recipe is modified or receives a new comment.
We'll never share your e-mail address with anyone else.
Alternatively: you can subscribe to the mailing list of cooling-ez.com , you will receive a e-mail for each new recipe published on the site.